Tutorial - React Native and iOS pipeline
Harness CI Cloud offers Mac infrastructure that you can use to build, test, and publish iOS applications.
React Native is an open source UI framework from Meta. React Native enables developers to write natively-rendered Android and iOS applications in the React framework.
This tutorial covers how to build, test, and publish a React Native iOS app to Apple's TestFlight service with Fastlane.
Prerequisites
For this tutorial, you need the following:
- A Harness account with Harness CI Cloud Mac infrastructure enabled.
- Access to a Git provider.
- An Apple account enrolled in the Apple Developer Program or admin access to App Store Connect for an existing account.
Currently, macOS platforms for Harness Cloud are behind a feature flag with limited availability. You can submit a request to enable the feature.
Create React Native app
Some of the steps demonstrated in this tutorial are also available in the React Native quickstart guide. More details are provided for those who are new to React Native.
-
Generate a sample project with the react-native-cli.
npx react-native@0.73.6 init --package-name PACKAGE_NAME APP_NAMEPassing
--package-name PACKAGE_NAMEensures a unique Bundle ID for the application.PACKAGE_NAMEshould be in reverse-DNS format.For example, since Apple owns apple.com, all Apple bundle IDs are prefixed with
com.apple..Your app's bundle ID must be a uniform type identifier (UTI) and case insensitive.
APP_NAMEis the name of your application, it must be alphanumeric and less than 30 characters. -
Answer the necessary prompts.
iOS simulator
-
Change to the application directory
cd APP_NAME -
Run your app in the iOS Simulator.
npm run ios
The app takes a few minutes to build and install the app in the simulator.
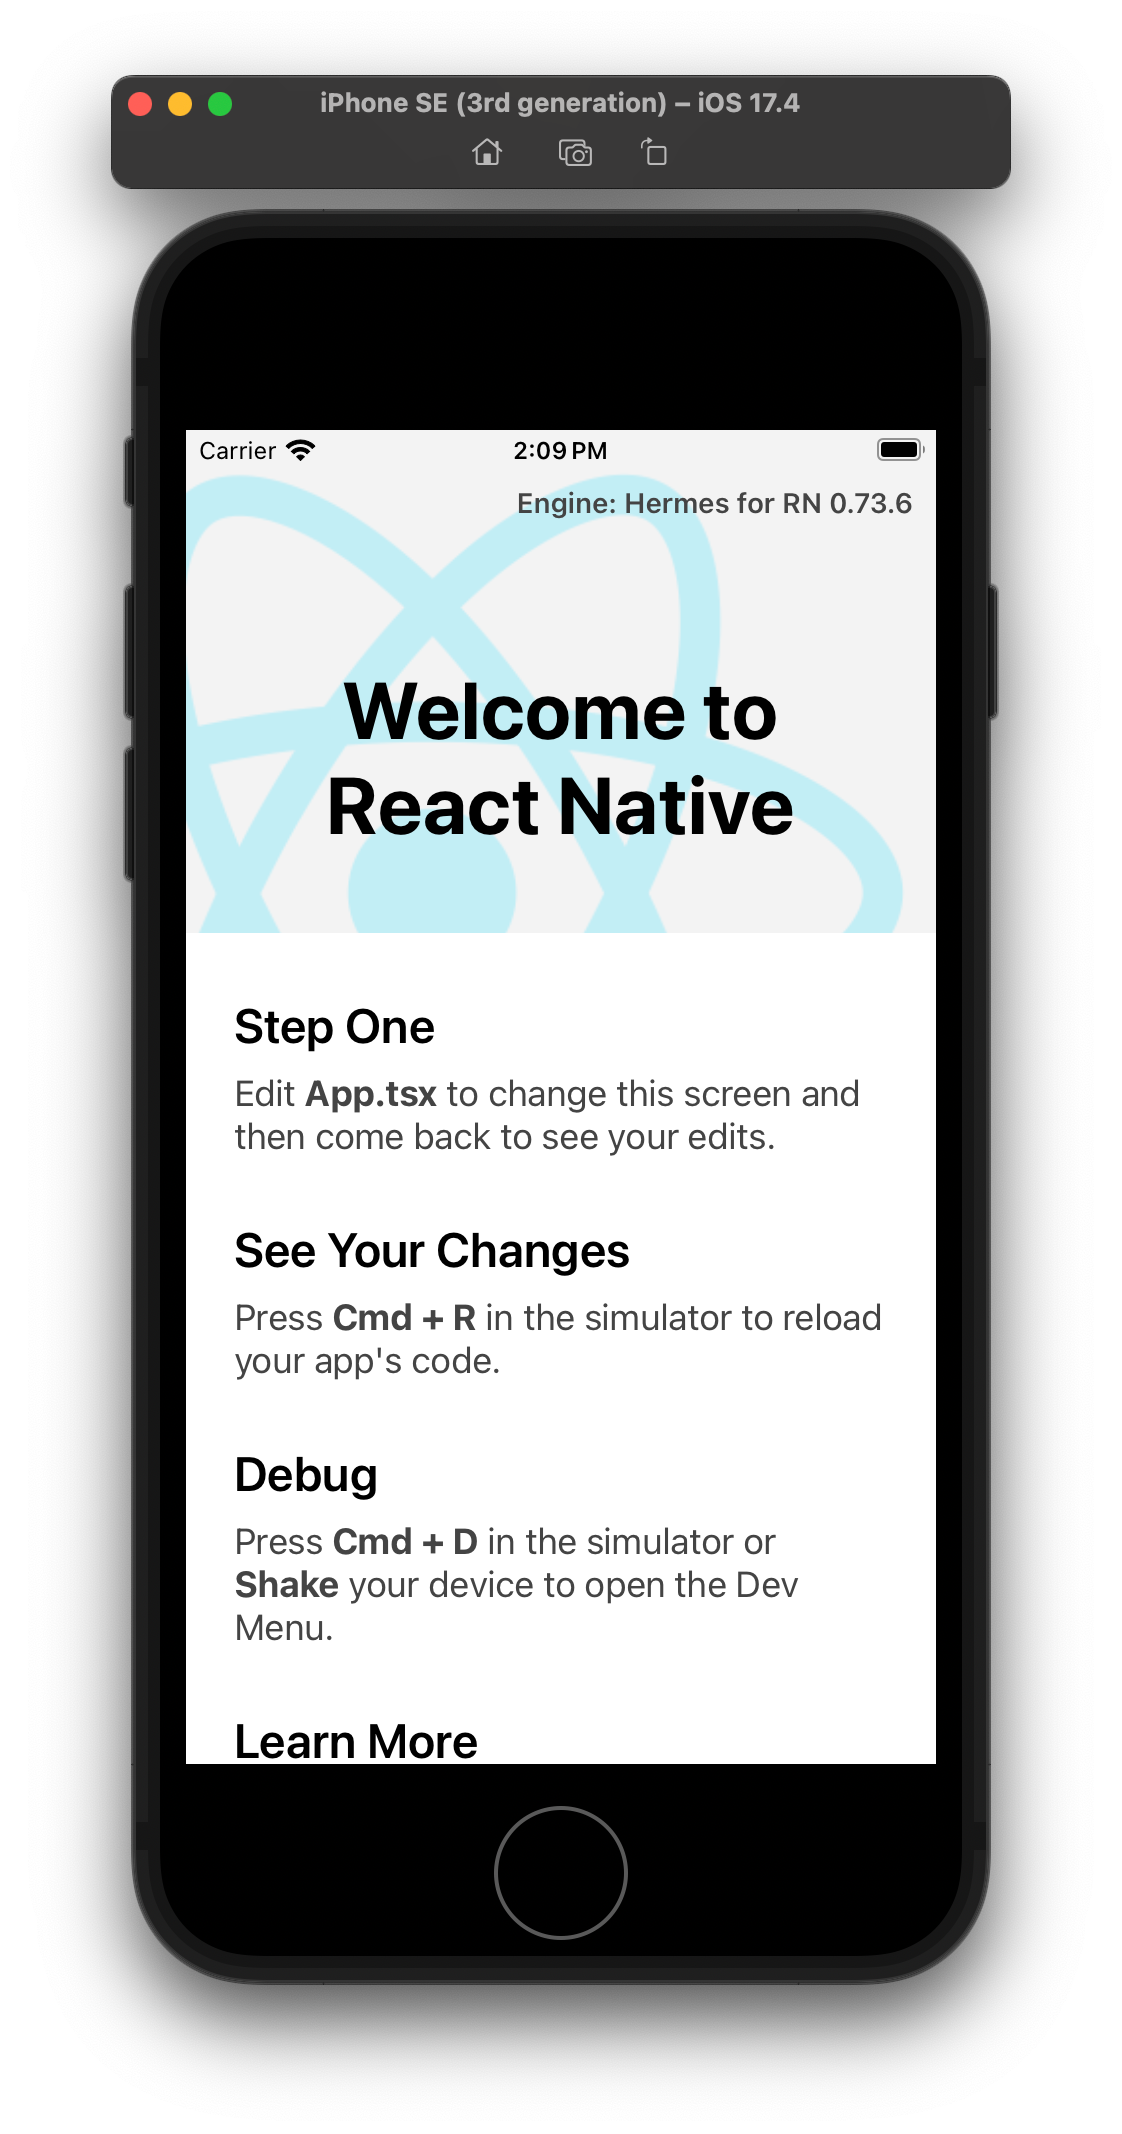
Changes to the App.tsx file are immediately reflected in the simulator.
Git repository
- Create a new repository in your Git provider, and then commit and push the contents of your application.
App icons
This sample application won't have an app icon; however, an icon is required to submit the app to TestFlight.
-
Open
ios/APP_NAME.xcodeprojin Xcode, and then select Images and AppIcon.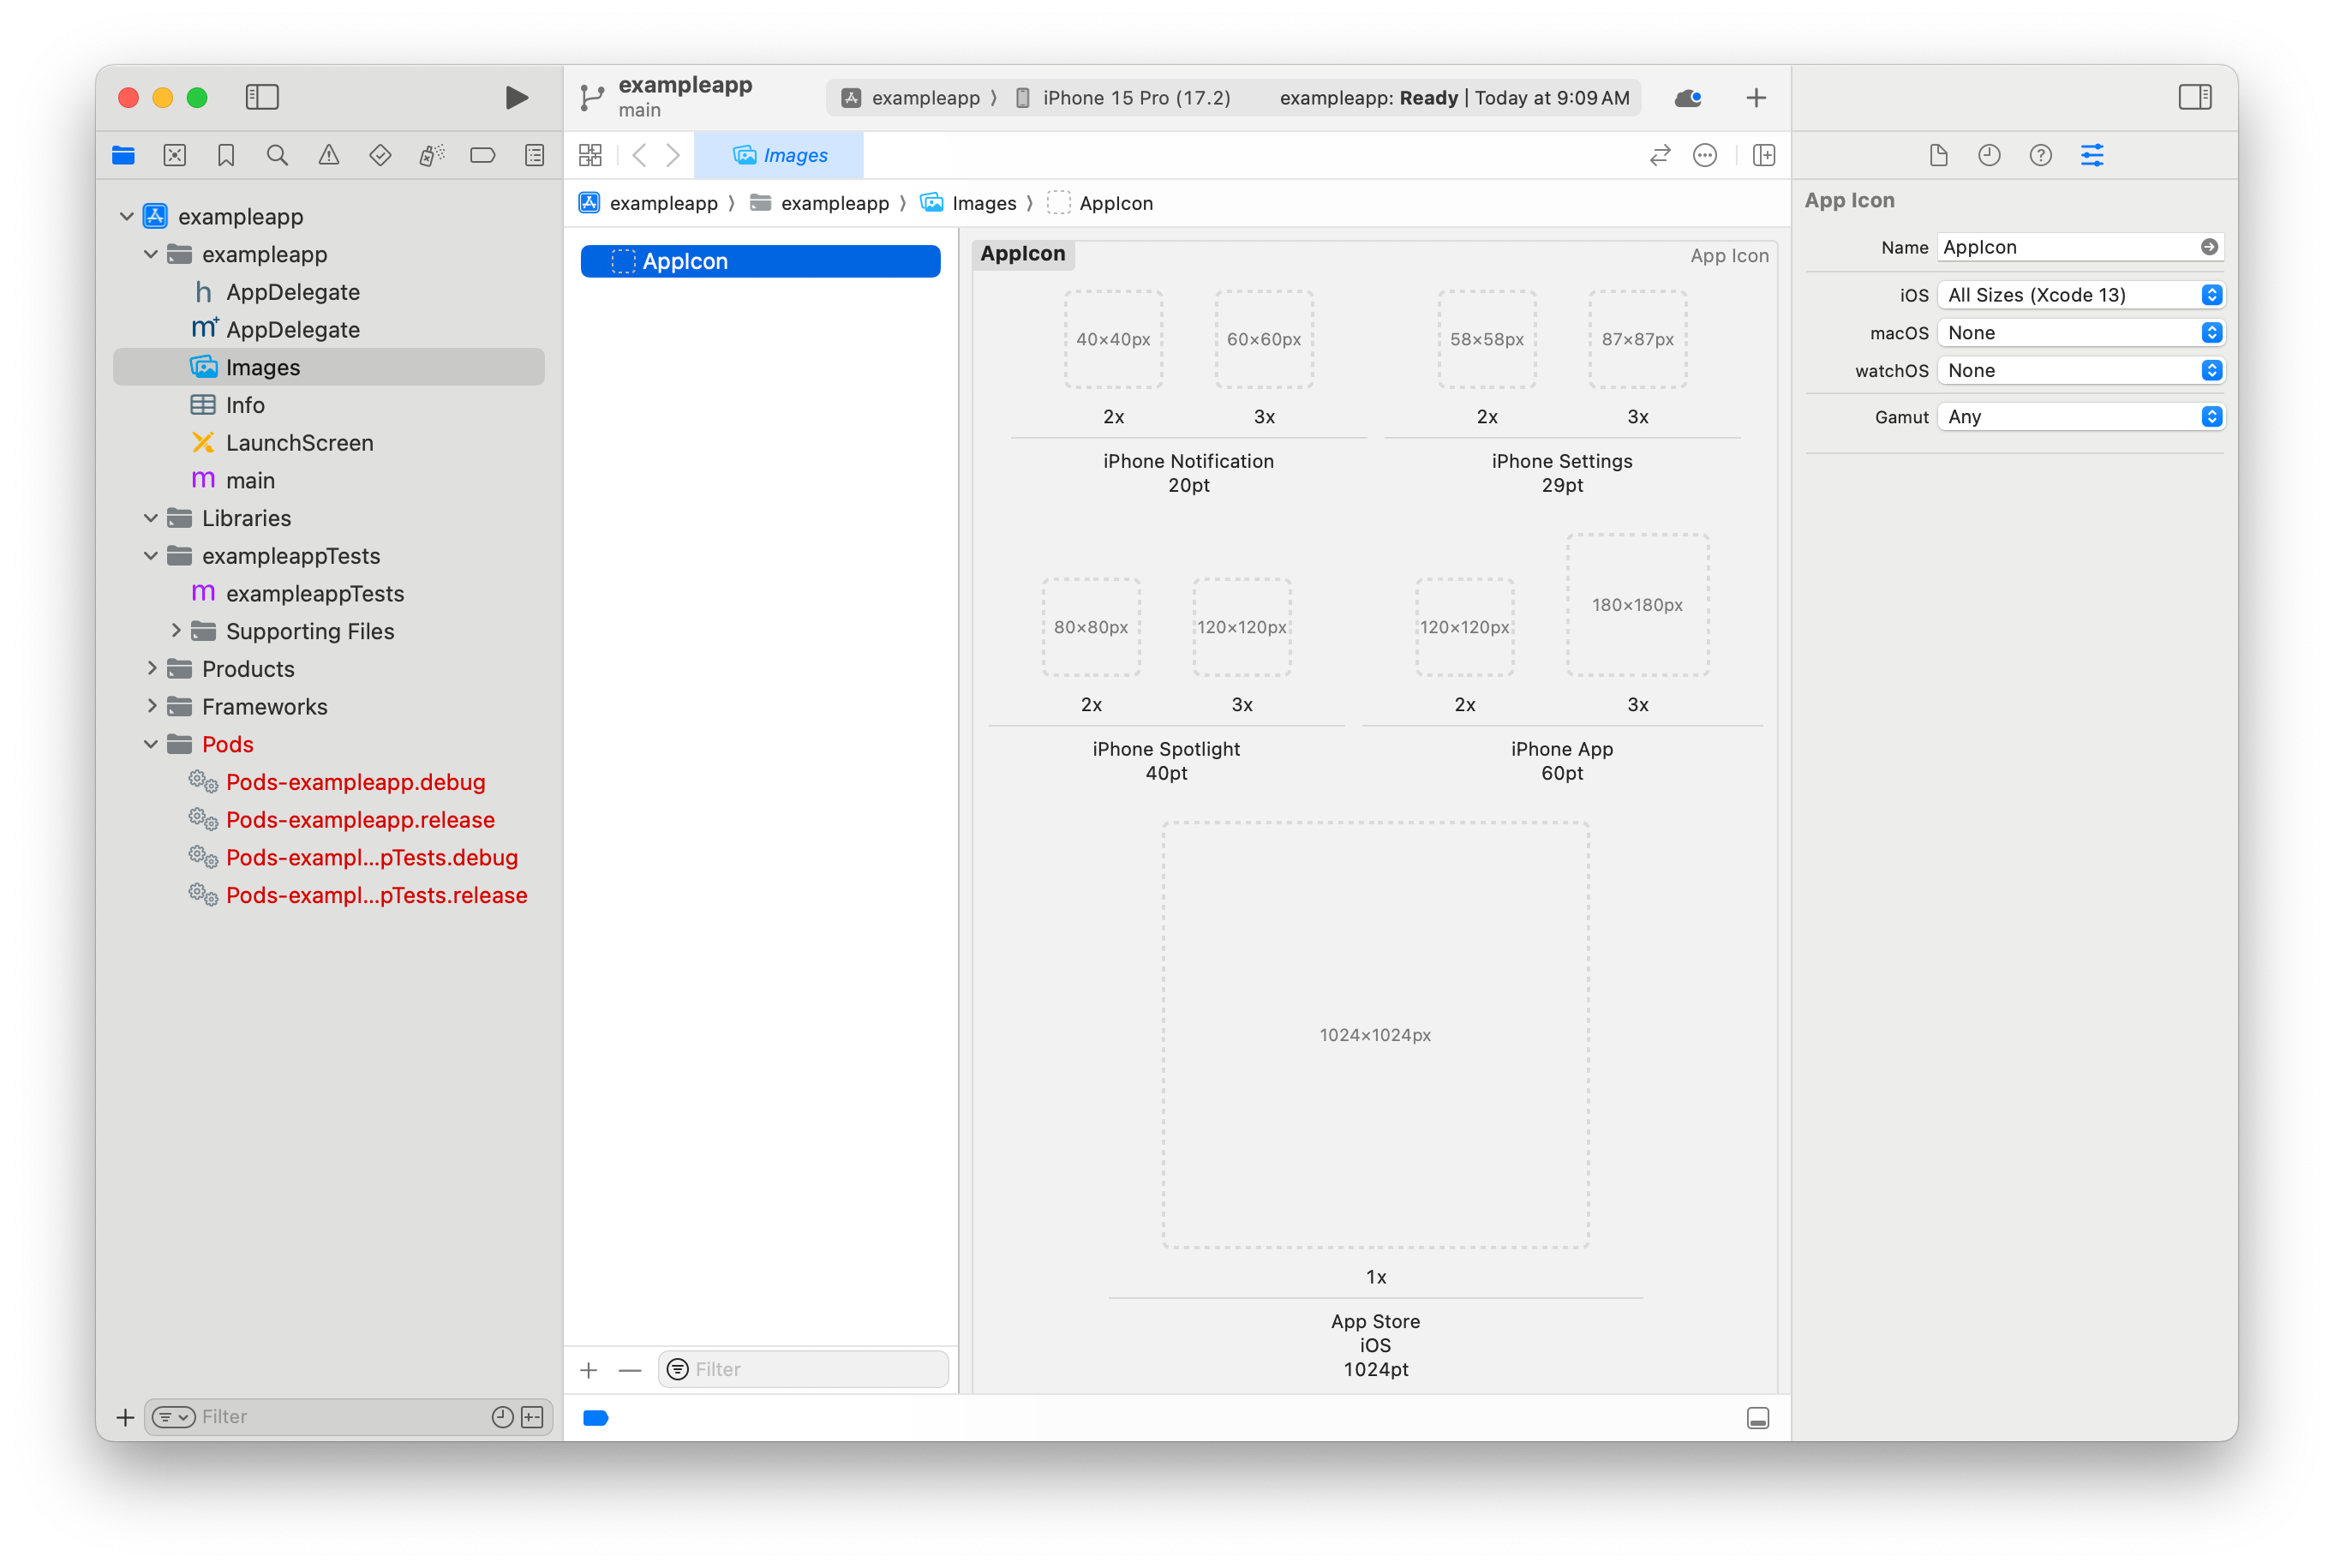
-
Generate a set of icons with a service like appicon.co, and then drag each generated icon into the appropriate location.
-
Commit and push these changes to your Git repository.
Fastlane
Fastlane is a command line tool that helps automate beta deployments and releases for mobile applications.
- Follow the setup guide to configure Fastlane in your app's
iosdirectory. When runningfastlane init, choose the "Manual setup" option. This creates afastlanedirectory with two files:AppfileandFastfile.
Appfile
-
At a minimum, you must set
app_identifierandapple_idinfastlane/Appfile.app_identifieris the Bundle ID of the app (referred to asPACKAGE_NAMEin theinitcommand in Create React Native app).apple_idis the Apple email address used to authenticate when publishing the app.These values can be hard-coded or they can passed as environment variables, for example:
app_identifier ENV["APP_BUNDLE_ID"]apple_id ENV["APPLE_USERNAME"] -
If you have different credentials for App Store Connect and the Apple Developer, you must set
team_idanditc_team_id.Go to Fastlane's Appfile documentation for details on writing this file for your App Store Connect account.
-
Commit and push all changes to your Git repository.
Match
Fastlane has an action called match that makes it easier to share signing credentials across teams and to your Harness pipeline.
match creates the required certificates and provisioning profiles, and then stores them in a separate Git repository, Google Cloud storage, or Amazon S3 bucket. Every team member with access to the selected storage can use those credentials for code signing.
- Follow the setup guide to configure match in your app project's
iosdirectory. This creates thefastlane/Matchfilefile.
The next step requires Developer permissions in your App Store Connect account.
-
When using a Git repository for storage, you are prompted for a password to encrypt all files in the repository. Securely store this password, and then create a Harness text secret named
MATCH_PASSWORDcontaining this password in your project. -
Commit and push all changes to your Git repository.
App Store Connect API Key
- Follow Apple's documentation to Create API Keys for App Store Connect API to create a Team Key. An Individual Key won't work.
This step requires Admin permissions in your App Store Connect account.
-
Store the Issuer ID as a text secret named
APPLE_API_KEY_ISSUER_IDin your project. -
Store the Key ID as a text secret named
APPLE_API_KEY_IDin your project.
The API key itself is a file, so it must be base64 encoded before it can be stored as a secret.
-
Save the API key to a file (such as
api-key.p8), and then encode it using your terminal. For example:cat api-key.p8 | base64 -
Save the encoded string as a text secret named
APPLE_API_KEY_CONTENTin your project.
Fastfile
The fastlane/Fastfile file stores the automation configuration that you can run with Fastlane. The file consists of lanes that define each step in your app's workflow.
In this example, you'll create lanes to build and sign the app, and then publish it to Apple's TestFlight service with a unique build number based on the Harness pipeline execution ID.
Your fastlane/Fastfile currently looks like this:
default_platform(:ios)

platform :ios do
  desc "Description of what the lane does"
  lane :custom_lane do
    # add actions here: https://docs.fastlane.tools/actions
  end
end
Modify this file to add lanes to the platform: ios section.
-
Add a lane to run an action that loads the Apple Store Connect API key information:
desc "Load ASC API Key information to use in subsequent lanes"lane :load_asc_api_key doapp_store_connect_api_key(key_id: ENV["APPLE_API_KEY_ID"],issuer_id: ENV["APPLE_API_KEY_ISSUER_ID"],key_content: ENV["APPLE_API_KEY_CONTENT"],is_key_content_base64: true,in_house: false)end -
Add a lane to run the match action:
desc "Uses match to pull in developer profile and certificates from git repo specified in Matchfile"lane :prep_build_release doapi_key = lane_context[SharedValues::APP_STORE_CONNECT_API_KEY]match(type: "appstore", api_key: api_key)end -
Add a lane to run the deliver action to upload the app to TestFlight:
desc "Upload to TestFlight / ASC"lane :deliver_to_testflight doapi_key = lane_context[SharedValues::APP_STORE_CONNECT_API_KEY]deliver(api_key: api_key,skip_screenshots: true,skip_metadata: true,skip_app_version_update: true,force: true,run_precheck_before_submit: false)end -
Add a lane to run all lanes and publish the app to TestFlight. This lane uses the update_code_signing_settings, increment_build_number, and build_app actions.
desc "Push a new beta build to TestFlight"lane :beta dosetup_ci if ENV['CI']load_asc_api_keyprep_build_release# Read app_identifier from Appfileapp_identifier = CredentialsManager::AppfileConfig.try_fetch_value(:app_identifier)profile_name = "match AppStore PACKAGE_NAME"output_name = "APP_NAME"# turn off automatic signing, signing is handled by 'match'update_code_signing_settings(use_automatic_signing: false,targets: ["APP_NAME"],code_sign_identity: "Apple Distribution",bundle_identifier: app_identifier,profile_name: profile_name,build_configurations: ["Release"],team_id: "TEAM_ID")# Set the build number based on the Harness pipeline execution IDincrement_build_number(build_number: ENV["HARNESS_BUILD_ID"],)build_app(workspace: "APP_NAME.xcworkspace",scheme: "APP_NAME",output_name: output_name,configuration: "Release",export_options: {method: "app-store"})deliver_to_testflightendReplace instances of
APP_NAMEandPACKAGE_NAMEwith the values from the init command.Replace
TEAM_IDwith your App Store Connect team ID. -
Add a lane that builds, but doesn't publish, the app. You can use this lane in pull request pipelines to ensure the app can be built successfully.
desc "Build without code sign. Just to see if the build is working."lane :build dobuild_app(workspace: "APP_NAME.xcworkspace",scheme: "APP_NAME",skip_package_ipa: true,skip_archive: true,skip_codesigning: true,silent: true,clean: true)endReplace instances of
APP_NAMEwith the value from the init command. -
Commit and push all changes to your Git repository.
Create Harness pipeline
- In your Harness account, select a Harness project, then select the Continuous Integration module.
- Use the Get Started wizard to connect your Git provider, activate your iOS app repository, and create an initial pipeline.
Add security scans stage
-
Add a Build stage to your pipeline named
Security. -
On the stage Infrastructure tab, select the Harness CI Cloud Linux platform.
-
Switch to the YAML editor using the switch at the top of the Pipeline Studio.
-
In the pipeline YAML editor, add a
Runstep namedNPM Install:- step:type: Runname: NPM Installidentifier: NPM_Installspec:shell: Shcommand: |-mkdir $HOME/nodejscurl -L https://nodejs.org/dist/v${NODE_VERSION}/node-v${NODE_VERSION}-linux-x64.tar.xz | tar xJ -C $HOME/nodejsexport PATH=$HOME/nodejs/node-v${NODE_VERSION}-linux-x64/bin:$PATHnpm install --global yarnyarnenvVariables:NODE_VERSION: 18.16.0 -
Add parallel steps for Owasp and Gitleaks scans.
- parallel:- step:type: Owaspname: Owaspidentifier: Owaspspec:mode: orchestrationconfig: defaulttarget:type: repositoryname: iOS appvariant: mainadvanced:log:level: infofail_on_severity: none- step:type: Gitleaksname: Gitleaksidentifier: Gitleaksspec:mode: orchestrationconfig: defaulttarget:type: repositorydetection: autoadvanced:log:level: infofail_on_severity: low
Add unit tests
You'll make some code changes related to unit tests. Your project will have a tests/App.test.tsx file with one Jest unit test.
-
Run the tests from the root of your repository.
npm testYou'll get the following output:
> io.harness.exampleapp@0.0.1 test> jestPASS __tests__/App.test.tsx✓ renders correctly (97 ms)Test Suites: 1 passed, 1 totalTests: 1 passed, 1 totalSnapshots: 0 totalTime: 0.495 s, estimated 1 sRan all test suites.
Harness supports test results that are in JUnit XML format, which is supported by jest-junit.
-
Install jest-junit.
npm install --save-dev jest-junit -
Edit the file
jest.config.js.module.exports = {preset: 'react-native',reporters: [ "default", "jest-junit" ],}; -
Run the tests again.
npm testThe tests generate a
junit.xmlfile that Harness can ingest. -
Optionally, you can optionally add
junit.xmlto your repository's.gitignorefile.There is no need to check this file into your repository, since it is automatically generated.
-
Commit and push all changes to your Git repository.
Build stage
-
Add a Build stage to your pipeline named
Build. -
On the stage Infrastructure tab, select the Harness CI Cloud macOS platform.
-
Switch to the YAML editor using the switch at the top of the Pipeline Studio.
-
In the pipeline YAML editor, add a
Runstep namedRun NPM Tests.- step:type: Runname: Run NPM Testsidentifier: Run_NPM_Testsspec:shell: Shreports:type: JUnitspec:paths:- junit.xmlcommand: |yarnnpm test -
Add a
Runstep namedInstall Build Dependencies.- step:identifier: Install_Build_Dependenciestype: Runname: Install Build Dependenciesspec:shell: ShenvVariables:BUNDLE_JOBS: "4"BUNDLE_RETRY: "3"command: |-cd iosgem update --systemgem install bundlerbundle installgem install cocoapodschmod 0600 /Users/anka/.netrcpod install -
Add a
Runstep namedBuild.- step:identifier: Buildtype: Runname: Buildspec:shell: BashenvVariables:CI: "true"APPLE_USERNAME: <+secrets.getValue("APPLE_USERNAME")>APPLE_API_KEY_ID: <+secrets.getValue("APPLE_API_KEY_ID")>APPLE_API_KEY_ISSUER_ID: <+secrets.getValue("APPLE_API_KEY_ISSUER_ID")>APPLE_API_KEY_CONTENT: <+secrets.getValue("APPLE_API_KEY_CONTENT")>MATCH_PASSWORD: <+secrets.getValue("MATCH_PASSWORD")>MATCH_USERNAME: APPLE_ID_USERNAMEcommand: |-cd ios# Pin Xcode versionsudo xcode-select -switch /Applications/Xcode_15.2.appif [ "$CI_BUILD_EVENT" == "pull_request" ]; thenFASTLANE_LANE=buildelseFASTLANE_LANE=betafibundle exec fastlane $FASTLANE_LANEReplace
APPLE_ID_USERNAMEwith your Apple ID username.tipYou may need to pass additional match secrets.
For example, if you are storing your certificates in Git, you will also need to pass
MATCH_GIT_BASIC_AUTHORIZATION.
Trigger pipeline
-
Save and run the pipeline.
-
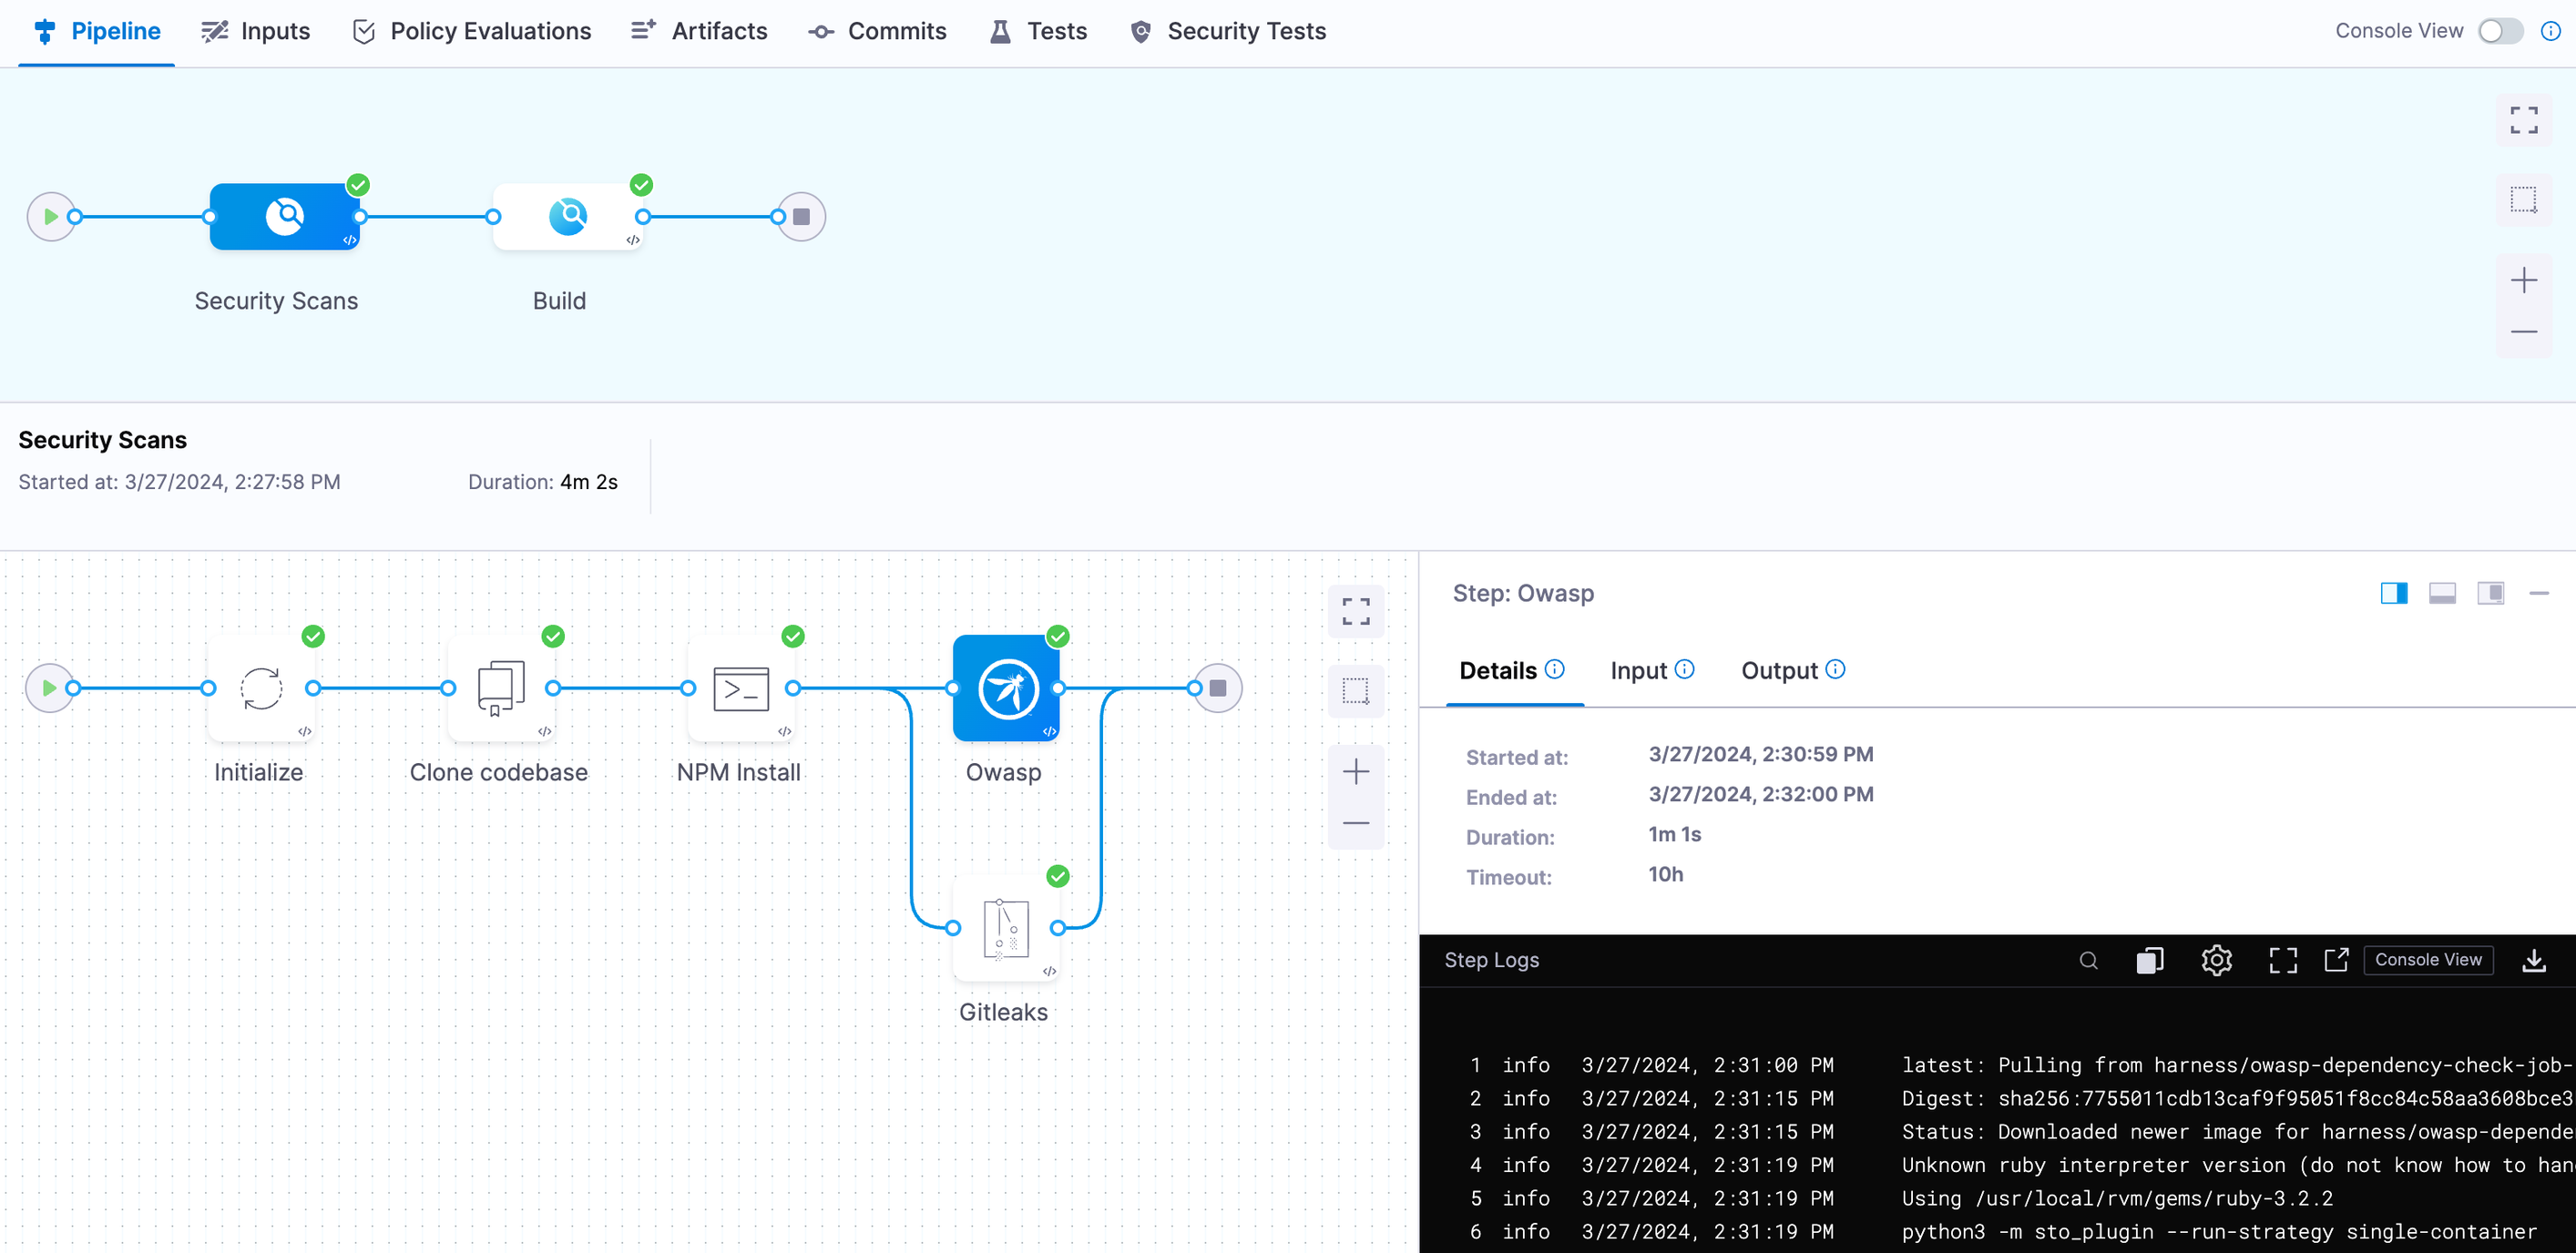
Observe the build logs while the pipeline runs.
Here's an example of the Security Scans stage execution:
And this is an example of the Build stage execution:
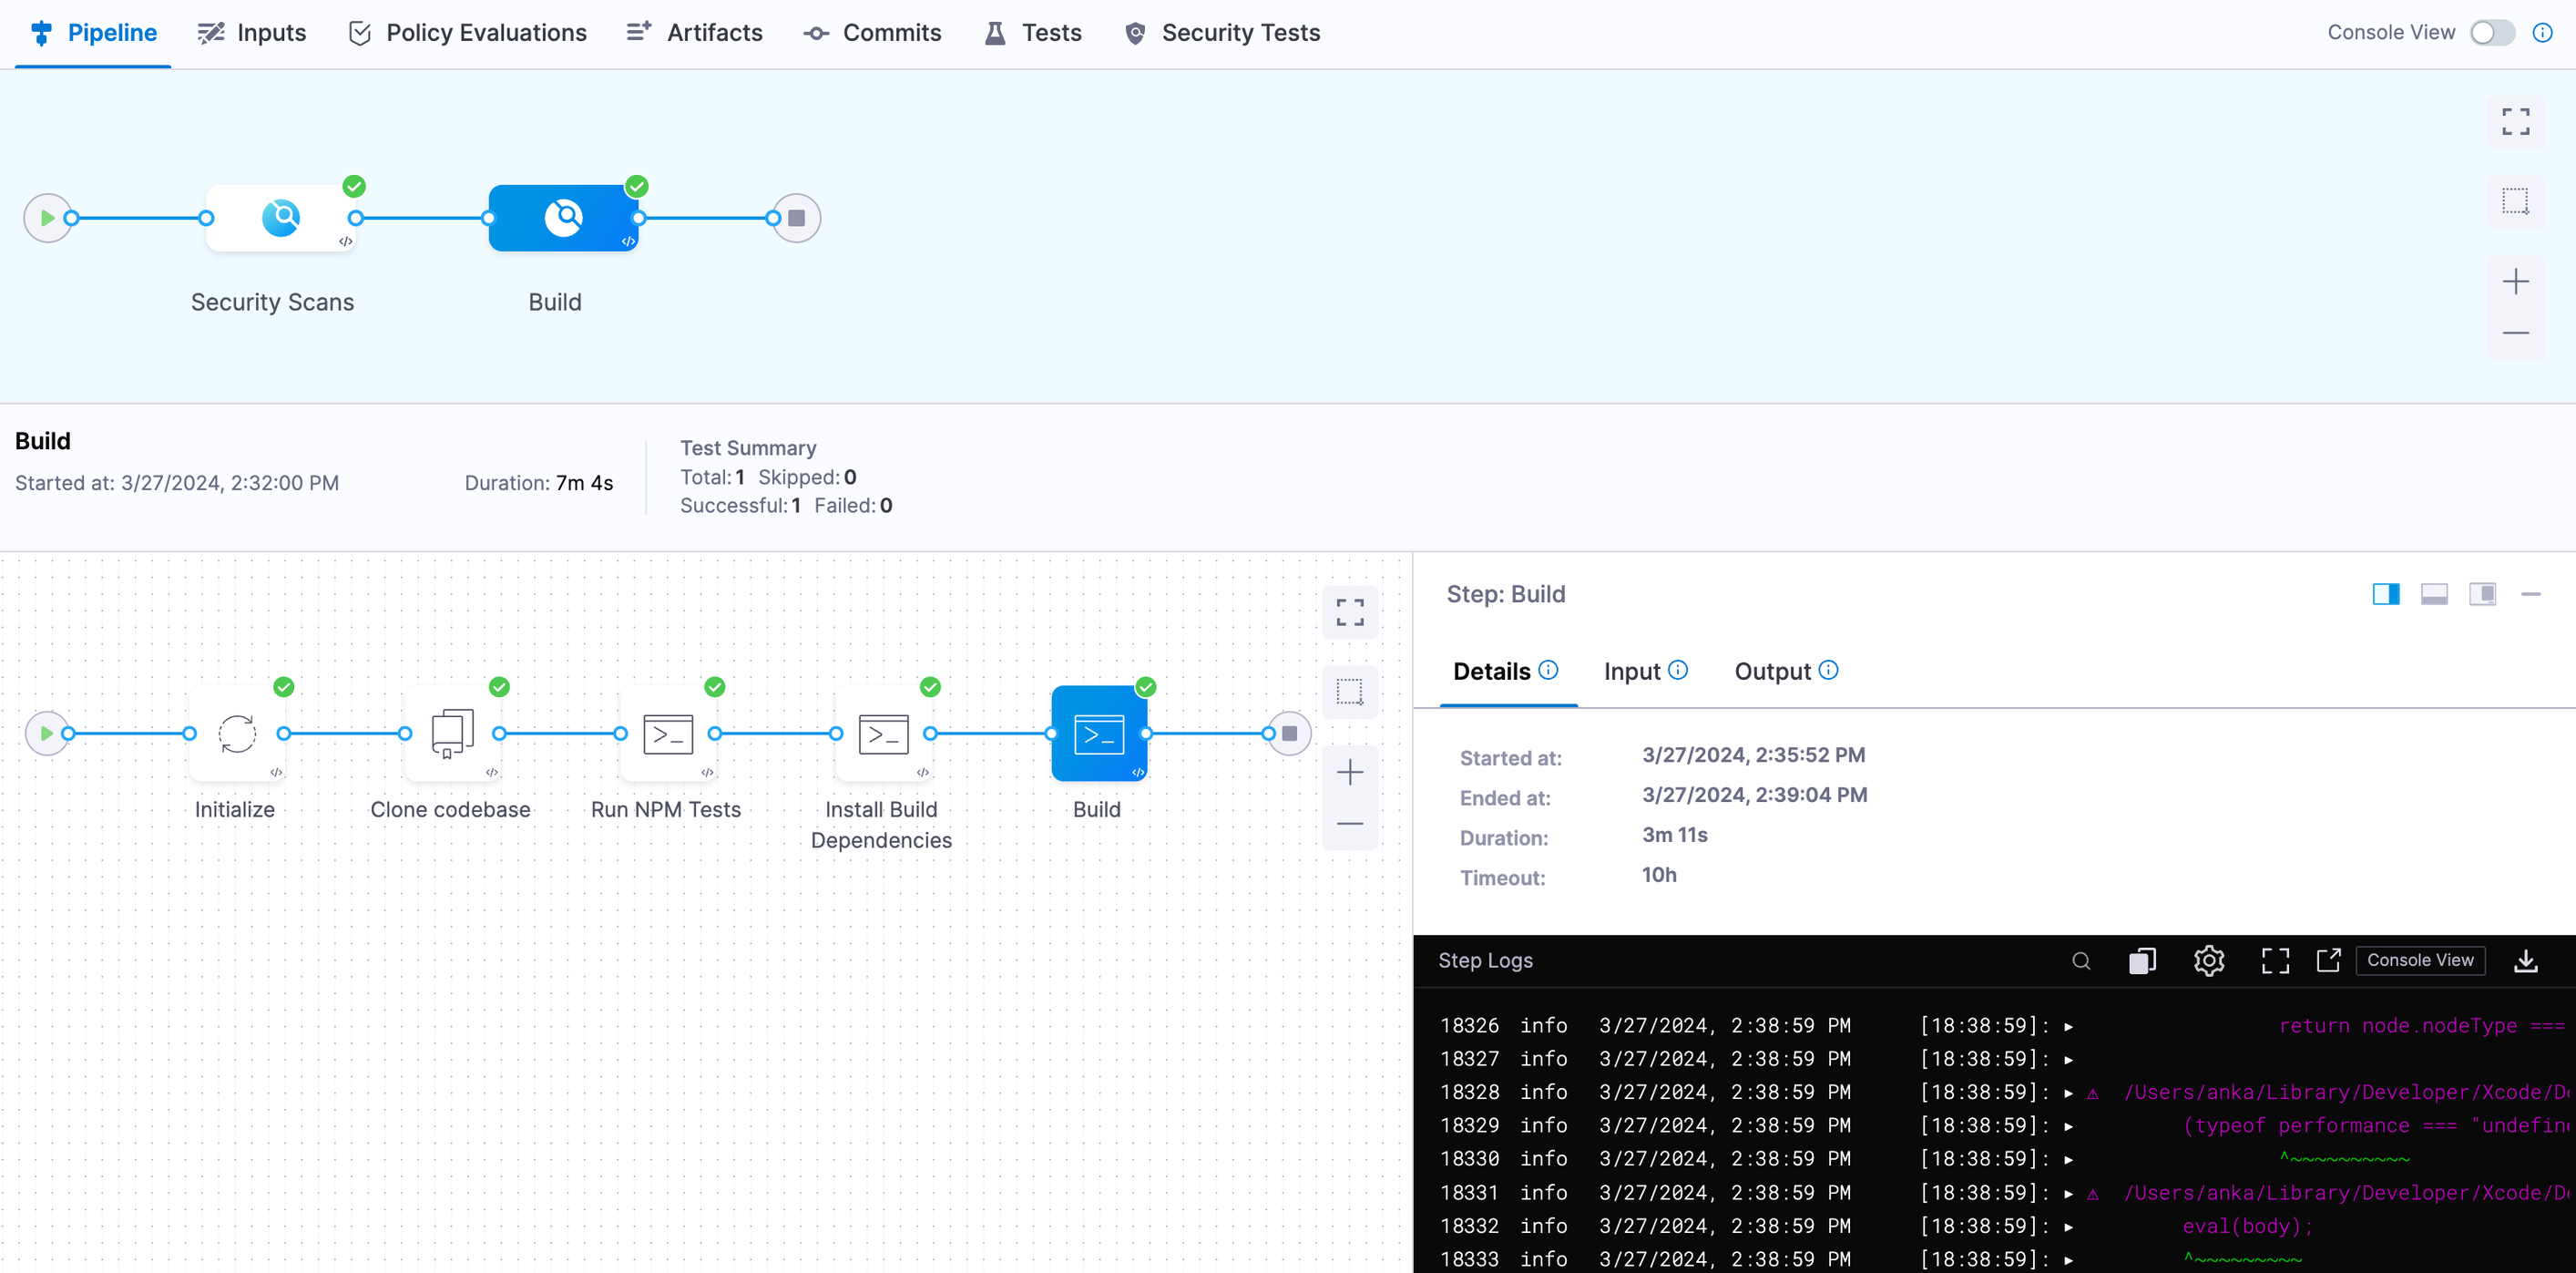
When complete, Fastlane prints a success message:
fastlane.tools finished successfully 🎉 -
To see your published build:
- Login to
https://appstoreconnect.apple.com. - Select Apps.
- Select your app from the list.
- Select the TestFlight tab.
- Your app's build appears in the list.
- Login to
Next steps
- Learn about TestFlight, and install your app on your iOS devices.
- Invite testers to try your app on their devices.
- Learn how to submit your app for review.