Register a Software Component in Catalog
Create an IDP YAML
The IDP YAML is a crucial descriptor file that provides metadata about the software components you register within our IDP. It serves as a blueprint, detailing essential information about each component, such as its name, description, owner, and other related metadata. This file ensures that our portal accurately represents and organizes the software components, making it easier for teams to discover and understand the tools and services available.
Although it is possible to name catalog entity descriptor files however you wish, we recommend that you name them idp.yaml.
idp.yaml follows the same Descriptor Format of Catalog Entities as Backstage.io.
Start with basic entity information
Begin your YAML file with the basic entity information, this contains the kind which could be any of the following:
and few others.
Out of this Component is quite widely used for service, website, library, etc. which needs to be specified as spec.type as discussed below.
apiVersion: backstage.io/v1alpha1
kind: Component
Provide metadata
Under the metadata section, provide essential details about your component:
metadata:
  name: artist-service
  description: The place to be, for great artists
Add labels (optional)
You can add key/value pairs as labels to classify the component:
labels:
  example.com/custom: custom_label_value
Add annotations (optional)
Annotations are used to reference external systems or provide additional non-identifying metadata:
annotations:
  harness.io/project-url: "https://app.harness.io/ng/account/accountid/cd/orgs/orgid/projects/projectid"
  github.com/project-slug: github/example-org/artist-website
Include tags (optional)
Tags are single-valued strings used to classify entities:
tags:
  - java
Provide external links (optional)
External hyperlinks related to the entity can be added for contextual information:
If you are referencing external URLs in your IDP.yaml file, such as Swagger documentation links, ensure that these URLs are allowed within the Harness Internal Developer Portal. This is a crucial step to ensure that the portal can access and display content from these external sources.
To allow external URLs:
- Navigate to Configure in the Harness Internal Developer Portal.
- Go to URL Allow List.
- Click on +Add Host.
- In the provided field, enter the URL pattern you wish to allow. For example, to allow all URLs from Swagger, you would enter
*.swagger.com. - Confirm and save your changes.
By following the above steps, you ensure that the portal can safely and correctly access the external content referenced in your IDP.yaml file.
links:
  - url: https://admin.example-org.com
    title: Admin Dashboard
    type: admin-dashboard
Specify component details
Under the spec section, provide specific details about the component:
Spec type
The current set of well-known and common values for this field is:
service- a backend service, typically exposing an APIwebsite- a websitelibrary- a software library, such as an npm module or a Java library
Spec owner
In the Harness Internal Developer Portal, the owner of a component is identified by the Harness User Group ID. This User Group ID represents the collective entity that holds ultimate responsibility for the component and possesses the authority and capability to develop and maintain it. Should any issues arise or if there are requests for features, this User Group will serve as the primary point of contact. The primary purpose of this field in the Harness IDP is for display, ensuring that individuals accessing catalog items can easily identify the responsible User Group for a given component.
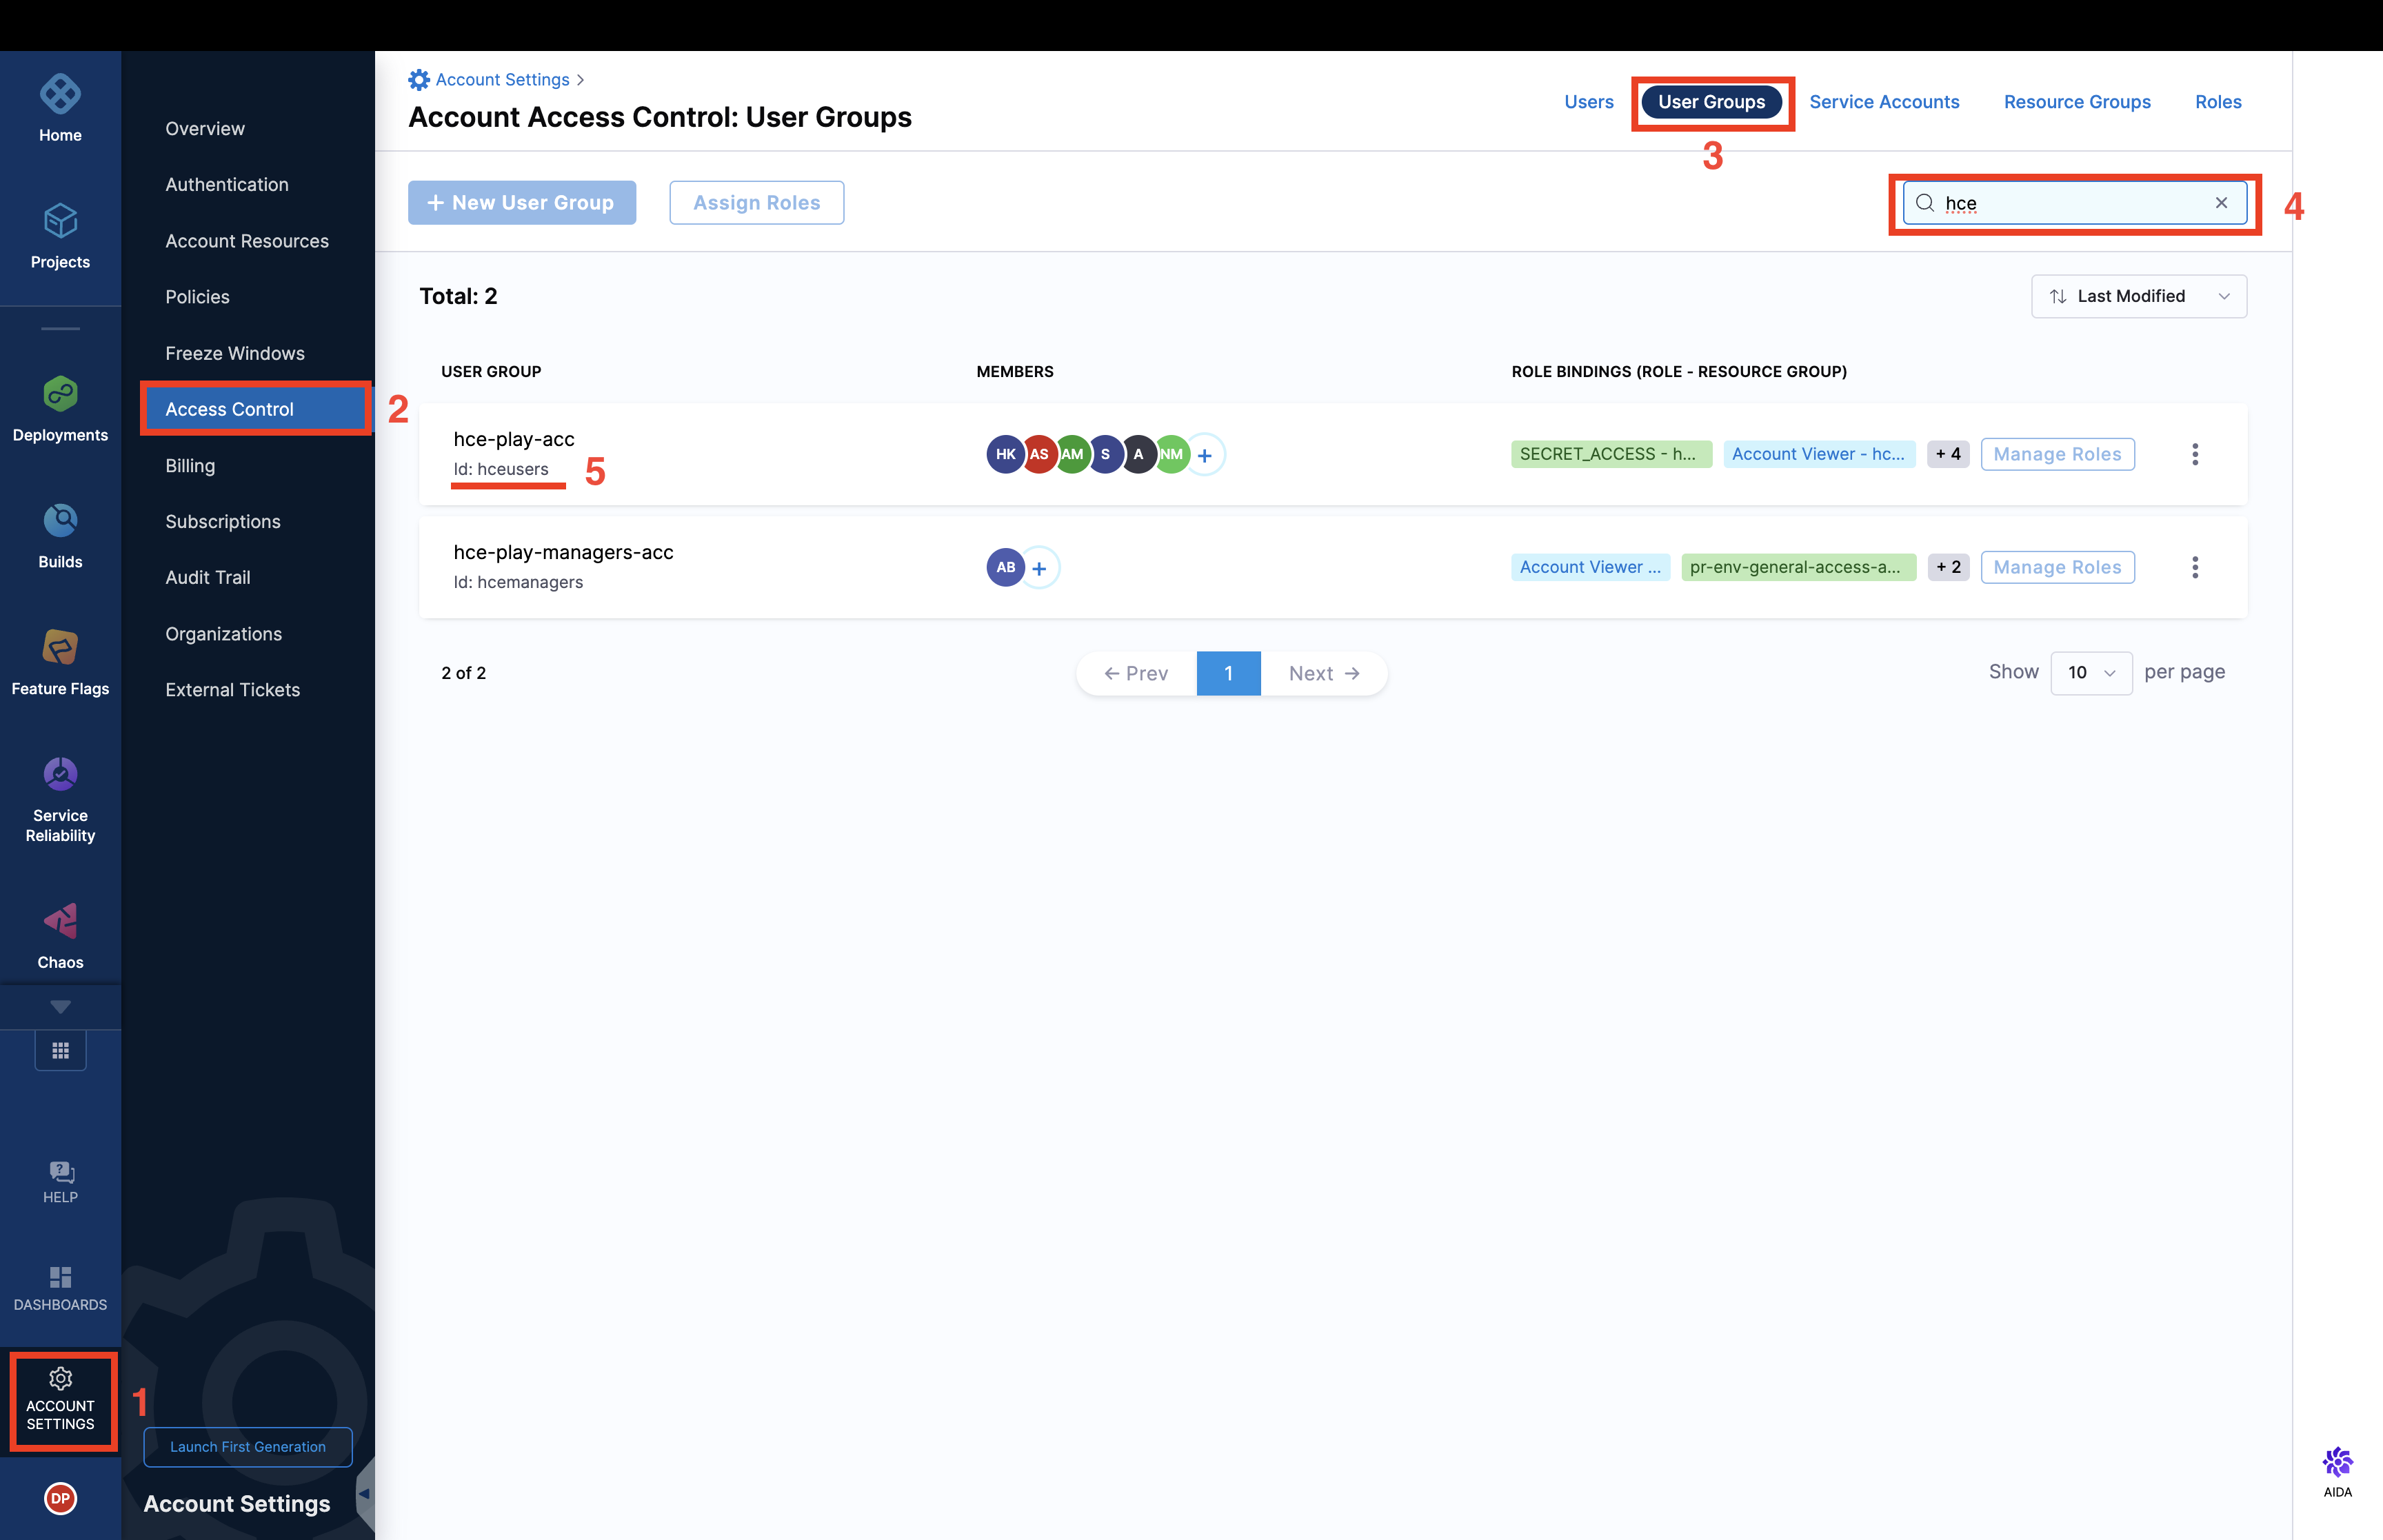
How to get the Harness User Group ID
- Navigate to the bottom left of the Harness dashboard and select Account settings.
- From the Account settings menu, select Access Control.
- Once in the Access Control section, look to the top right of the page and click on User Groups.
- You will see a search bar at the top. Use this to search for the specific user group you are interested in.
- Once you have located the desired user group, you will find the User Group ID listed. Simply copy this ID for your reference.
Spec system
A system is a collection of resources and components. The system may expose or consume one or several APIs. It is viewed as abstraction level that provides potential consumers insights into exposed features without needing a too detailed view into the details of all components. This also gives the owning team the possibility to decide about published artifacts and APIs.
Descriptor files for this kind may look as follows.
apiVersion: backstage.io/v1alpha1
kind: System
metadata:
  name: Custom Dashboards
  description: Handles creation of Custom Dashboard across different Harness Modules
spec:
  owner: platformengineeringteam
Spec lifecycle
The lifecycle state of the component, e.g. production. This field is required.
The software catalog accepts any lifecycle value, but an organization should take great care to establish a proper taxonomy for these.
The current set of well-known and common values for this field is:
production- an established, owned, maintained componentdeprecated- a component that is at the end of its lifecycle, and may disappear at a later point in time
Example Yaml with all the Spec
spec:
  type: service
  owner: platformengineeringteam
  system: developer-experience
  lifecycle: production
Substitutions in the descriptor format:
The descriptor format supports substitutions using $text, $json, and $yaml. Placeholders like $json: https://example.com/entity.json are substituted by the content of the referenced file. You can reference relative files like ./referenced.yaml from the same location. For example:
spec:
  type: service
  owner: platformengineeringteam
  system: developer-experience
  lifecycle: production
  definition: $text://developer.harness.io/docs/enhancing-developer-experience
Save the file:
Save the file with the recommended name idp.yaml and upload it on your file in your Git repository. If it is a mono-repo, navigate to its directory and create a idp.yaml at the root of the directory. The file can technically live anywhere (for example, .harness/idp.yaml).
Following is an example of the same.
apiVersion: backstage.io/v1alpha1
kind: Component
metadata:
  name: my-new-service
  description: Description of my new service
  annotations:
    pagerduty.com/integration-key: <sample-service-integration-key>
  tags:
    - java
  links:
    - url: https://admin.example-org.com
      title: Admin Dashboard
      type: admin-dashboard
spec:
  type: service
  lifecycle: production
  owner: team-a
  system: project-x
Register with Harness IDP:
To register this component with Harness IDP, you will need to submit this YAML file to the appropriate API endpoint or Register the existing component using UI.
- Harness Platform
- API
Follow the steps below to register components in the Harness Platform UI:
- Once the file is created in your git repo, copy the full URL to the file. For example,
https://github.com/harness-community/idp-samples/blob/main/catalog-info.yaml.
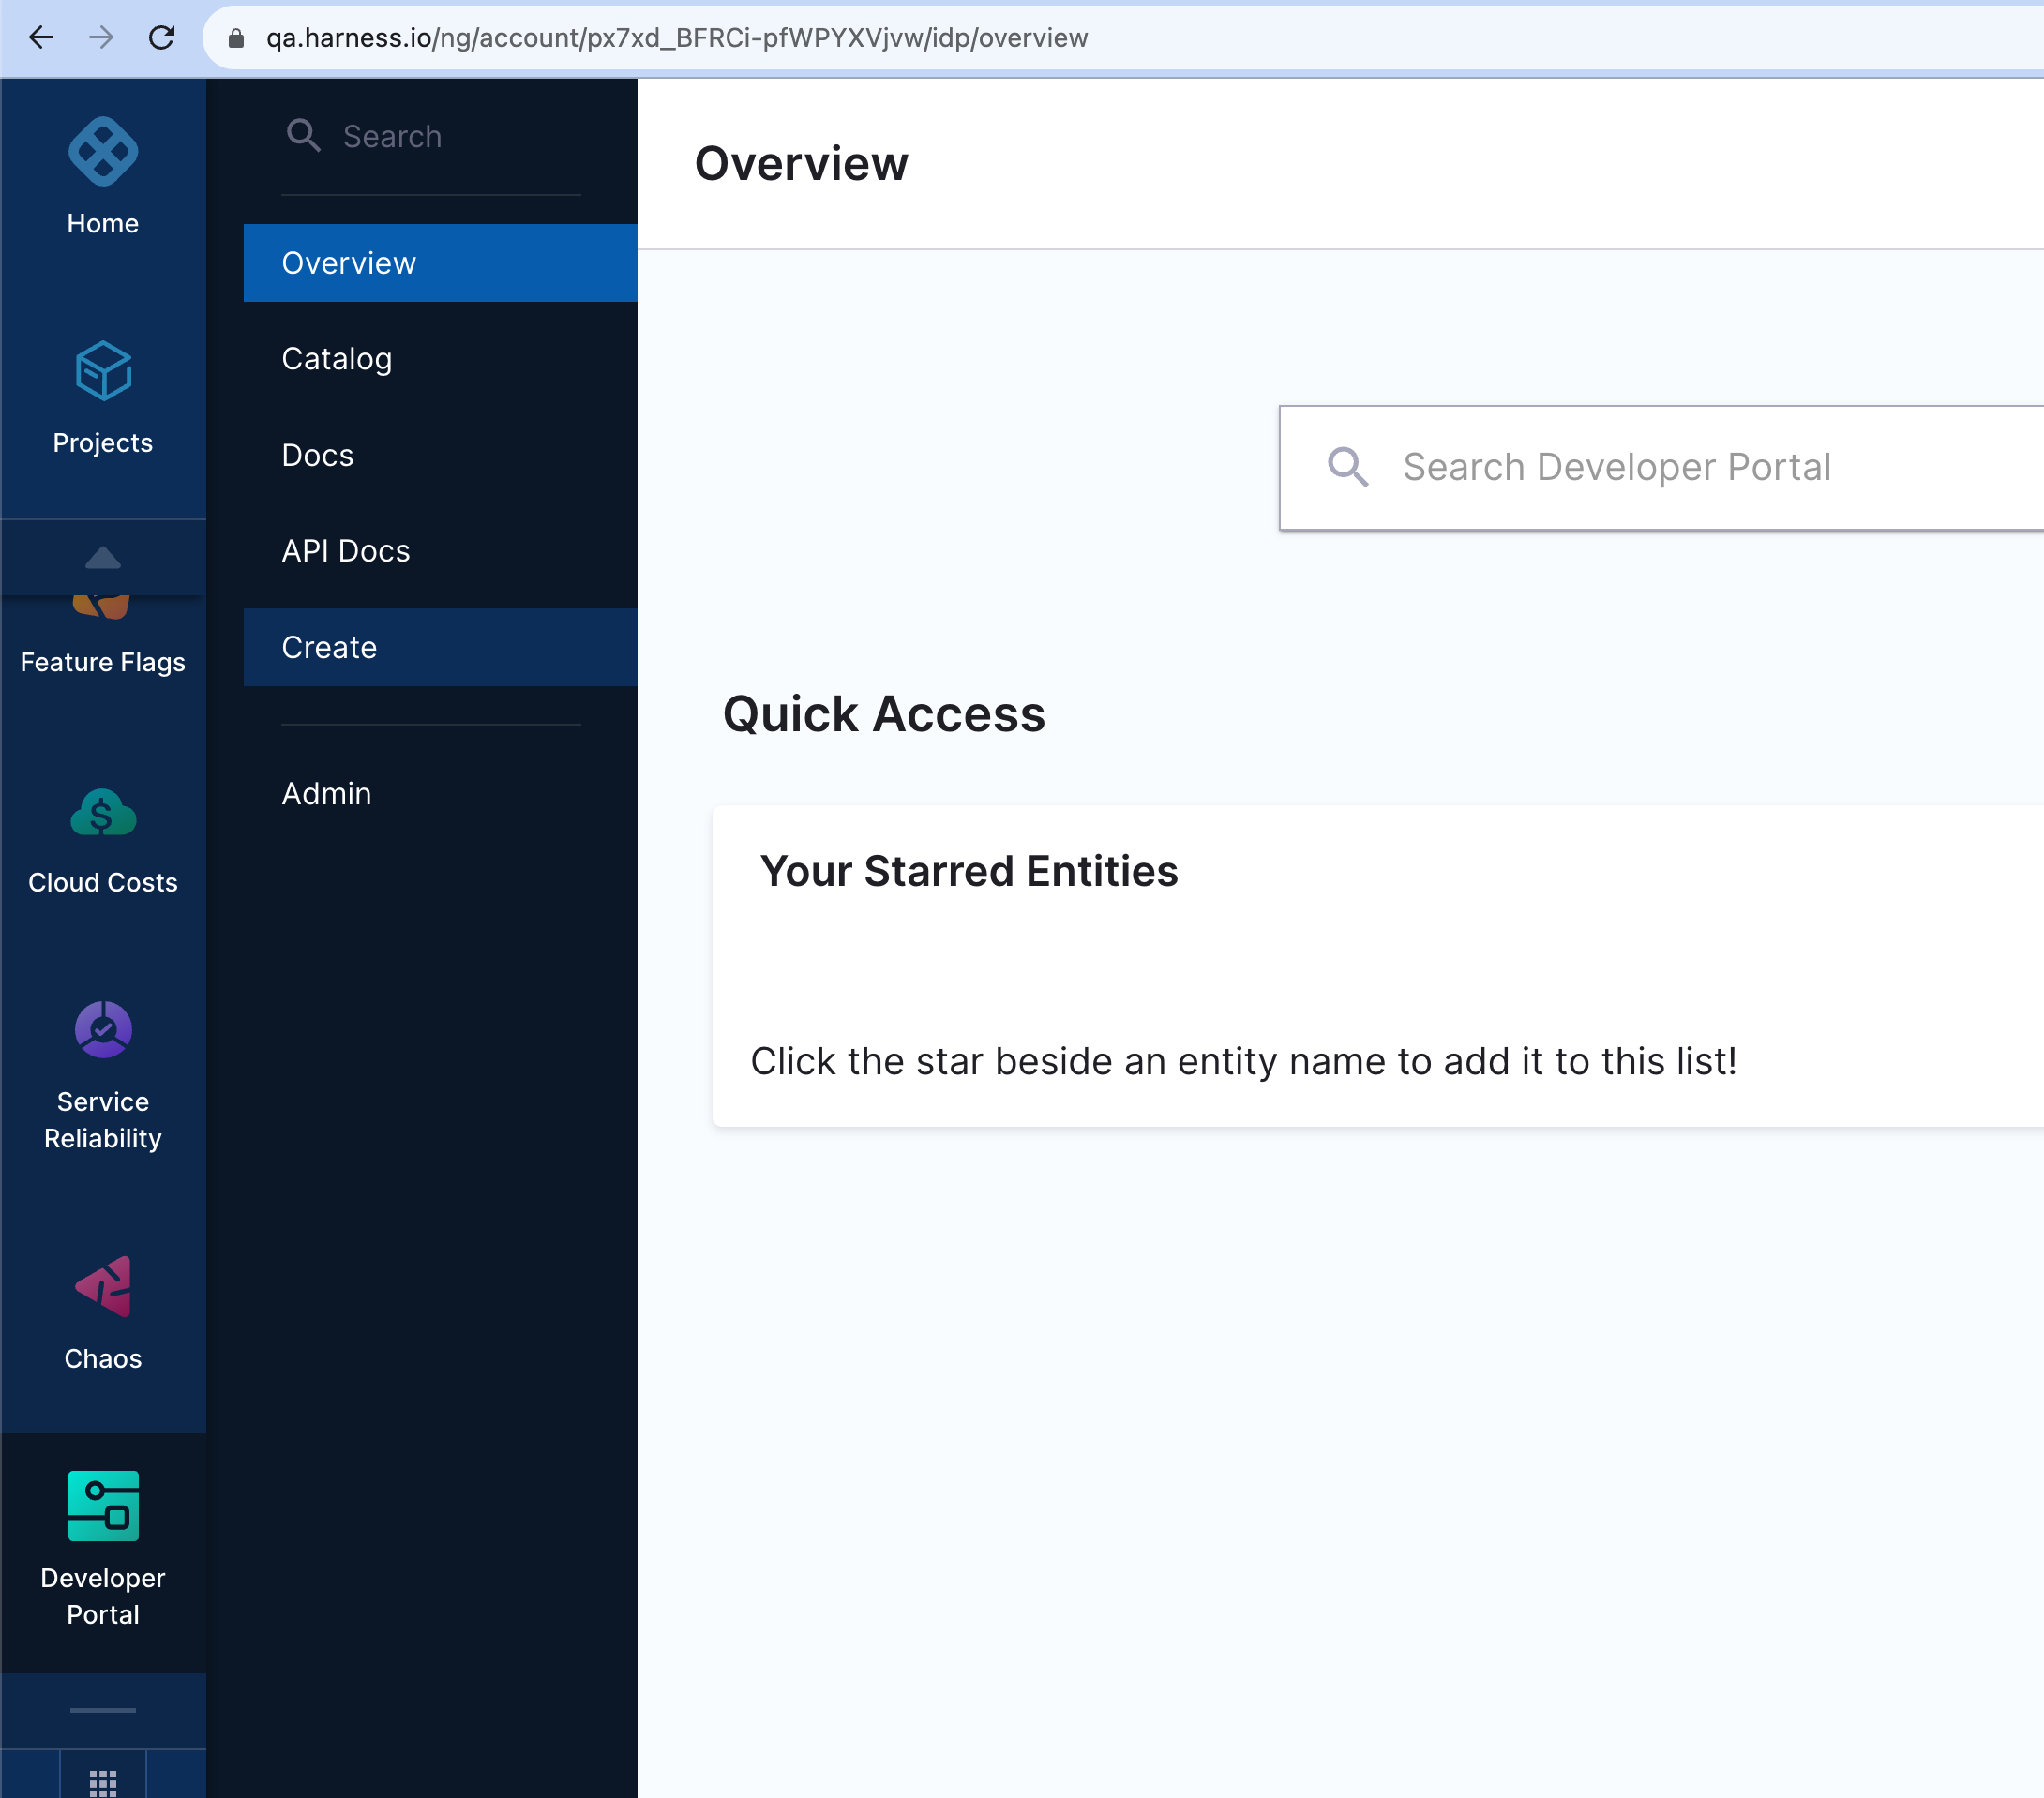
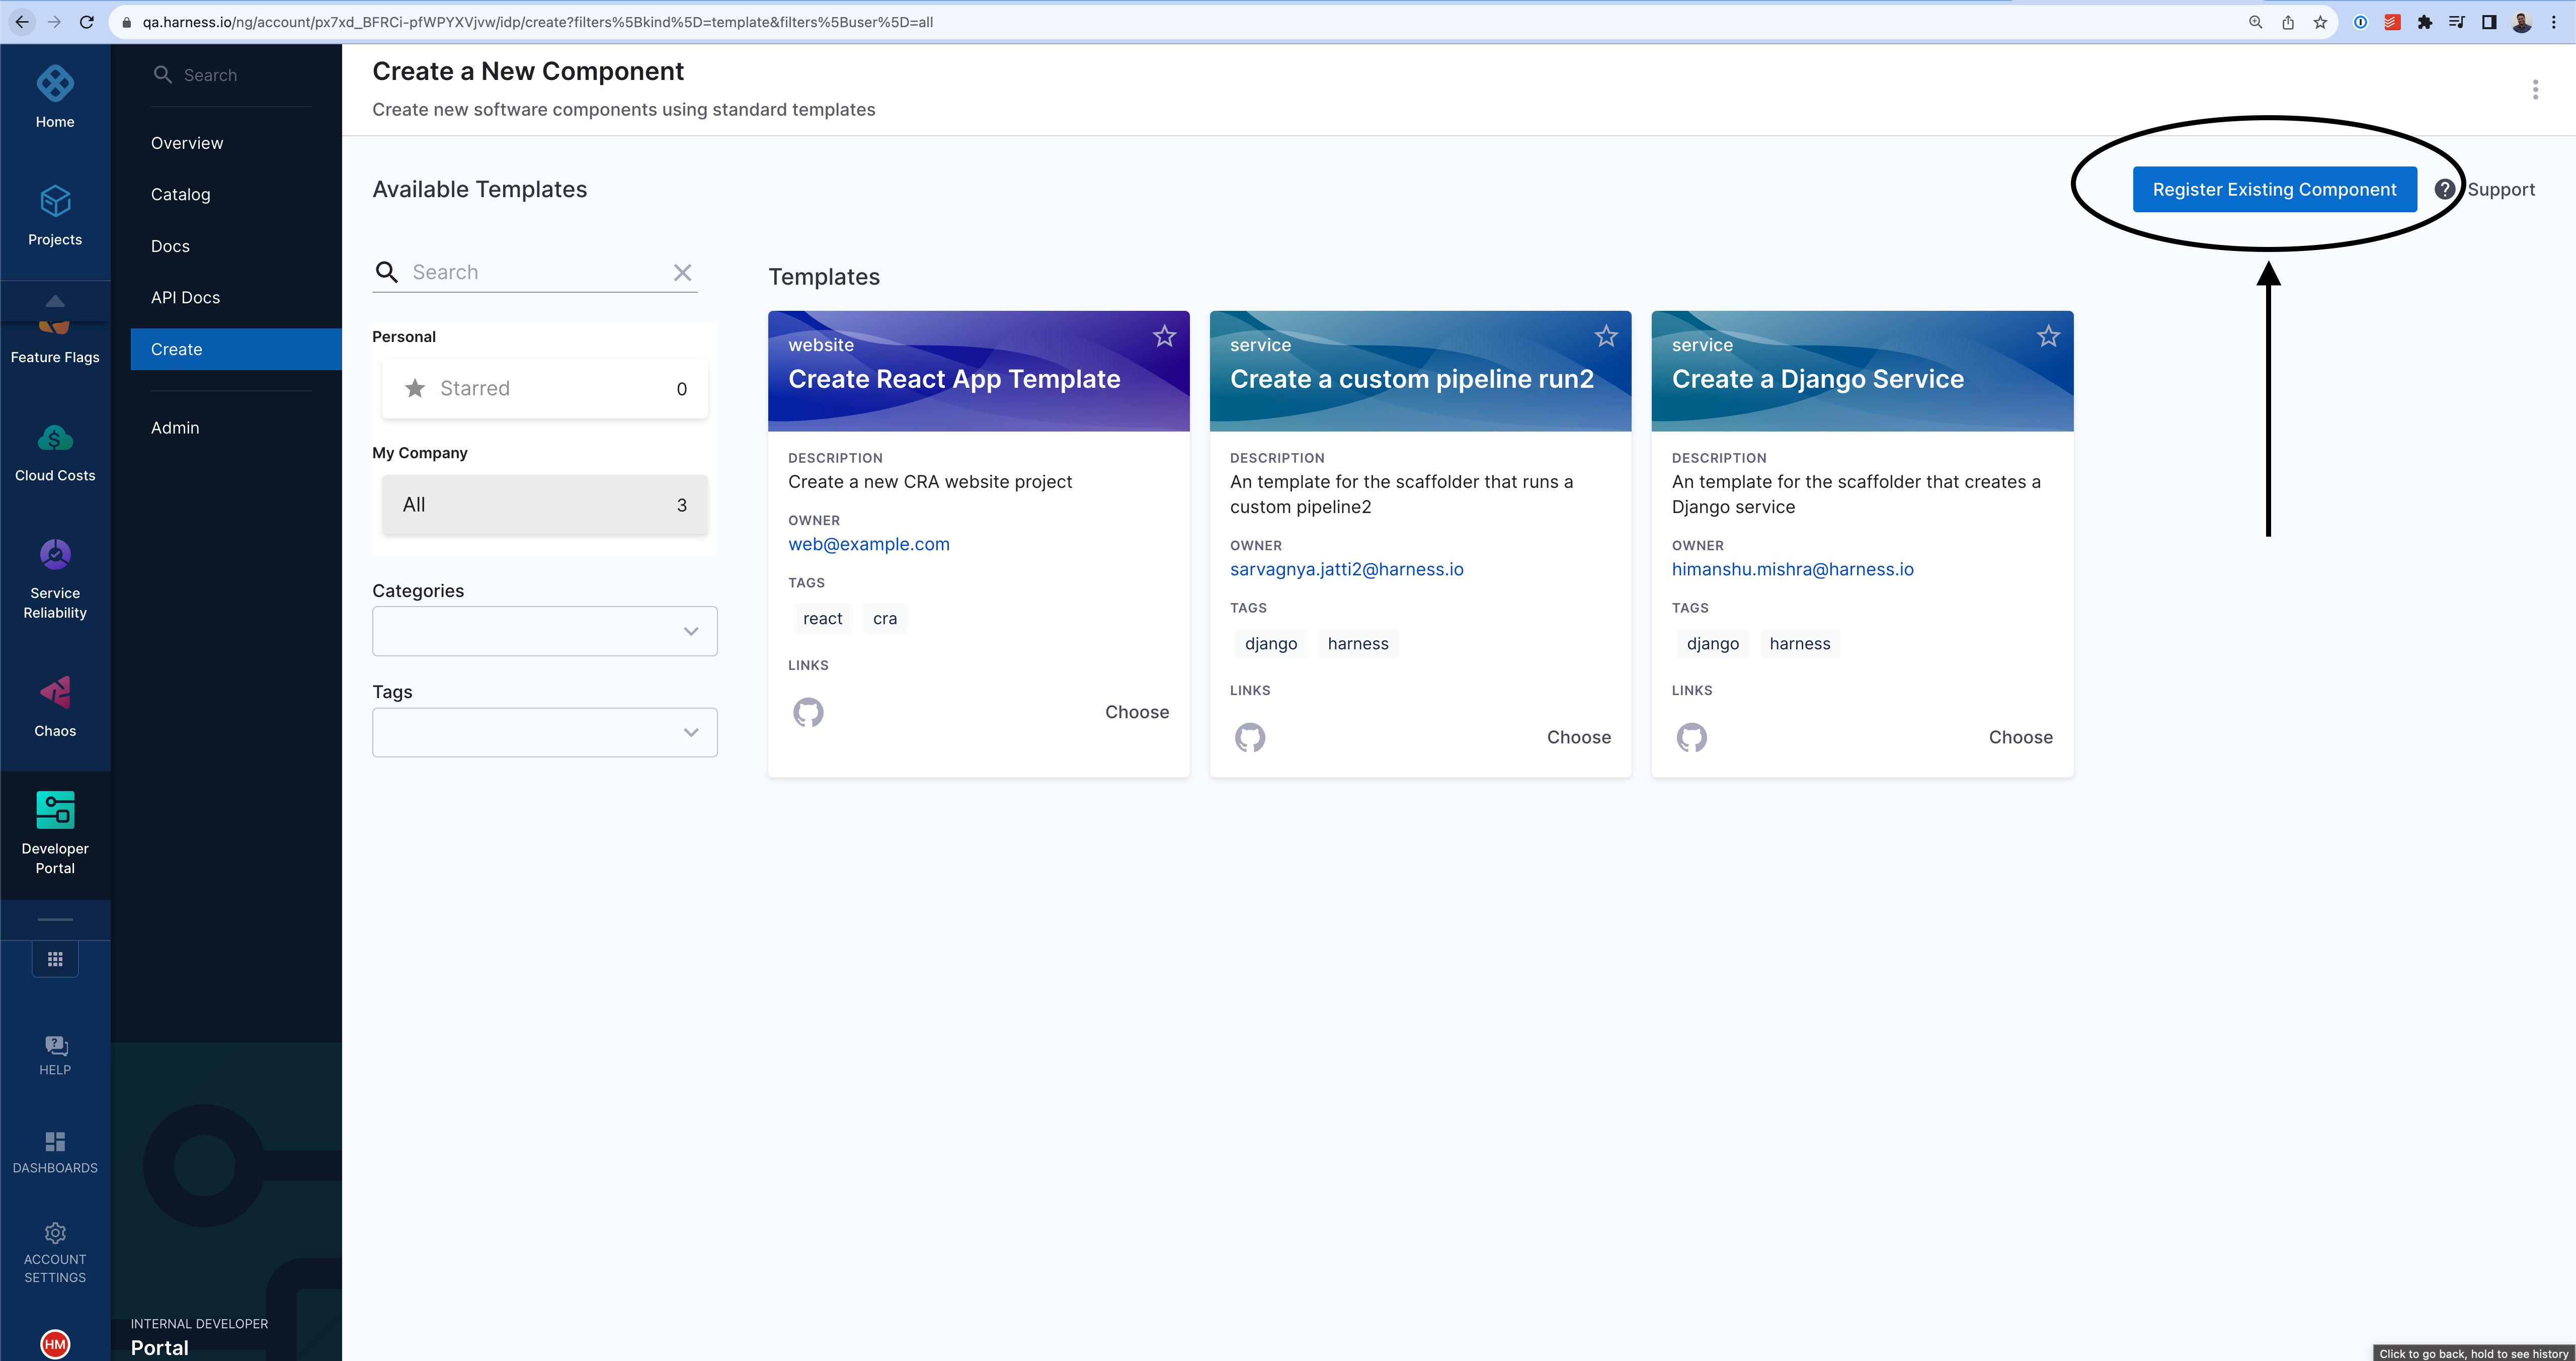
- In the left navigation, select Create, and then select Register Software Component.
- Enter the URL to your new
idp.yaml.
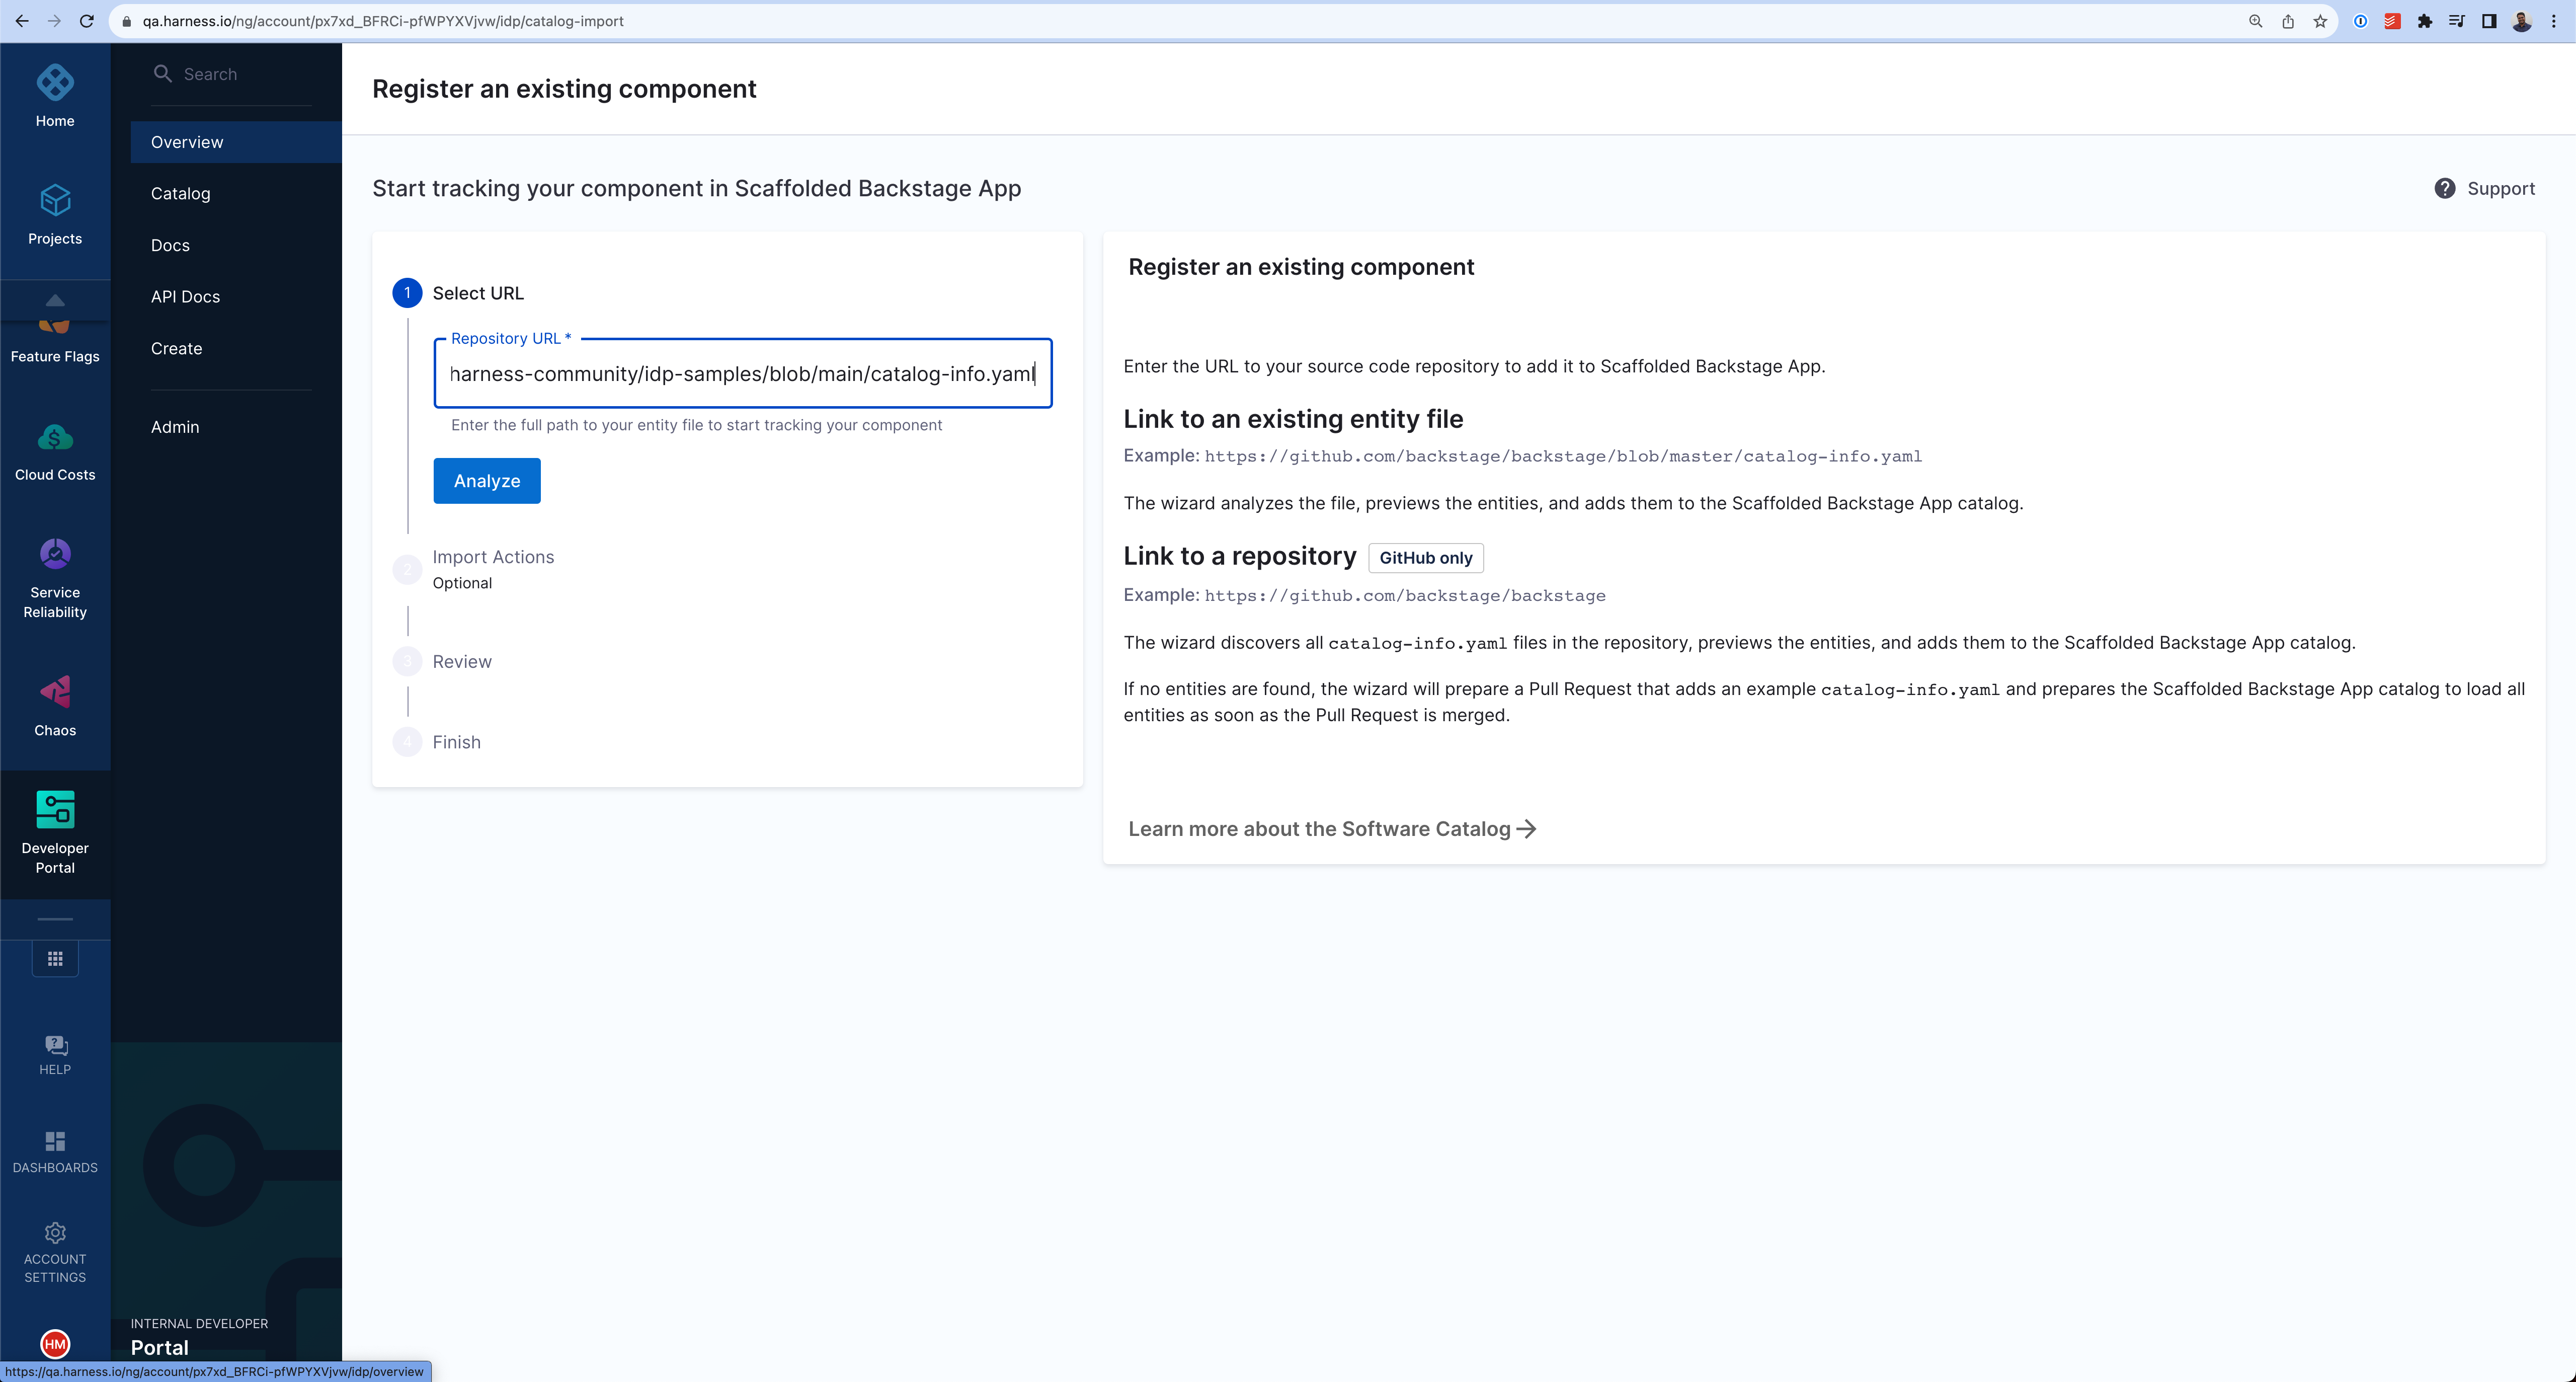
- Click Import.

Follow these steps to register components using the Harness Catalog API endpoint:
- Generate a Harness API Key as described in Manage API keys
- Follow the following cURL command with the request body to register your component. The body takes two input at present
typeandtarget.
curl --location 'https://idp.harness.io/<ACCOUNT_ID>/idp/api/catalog/locations' \
--header 'x-api-key: <HARNESS_TOKEN>' \
 --data-raw '{"type":"url","target":"https://github.com/harness-community/idp-samples/blob/main/catalog-info.yaml"}'
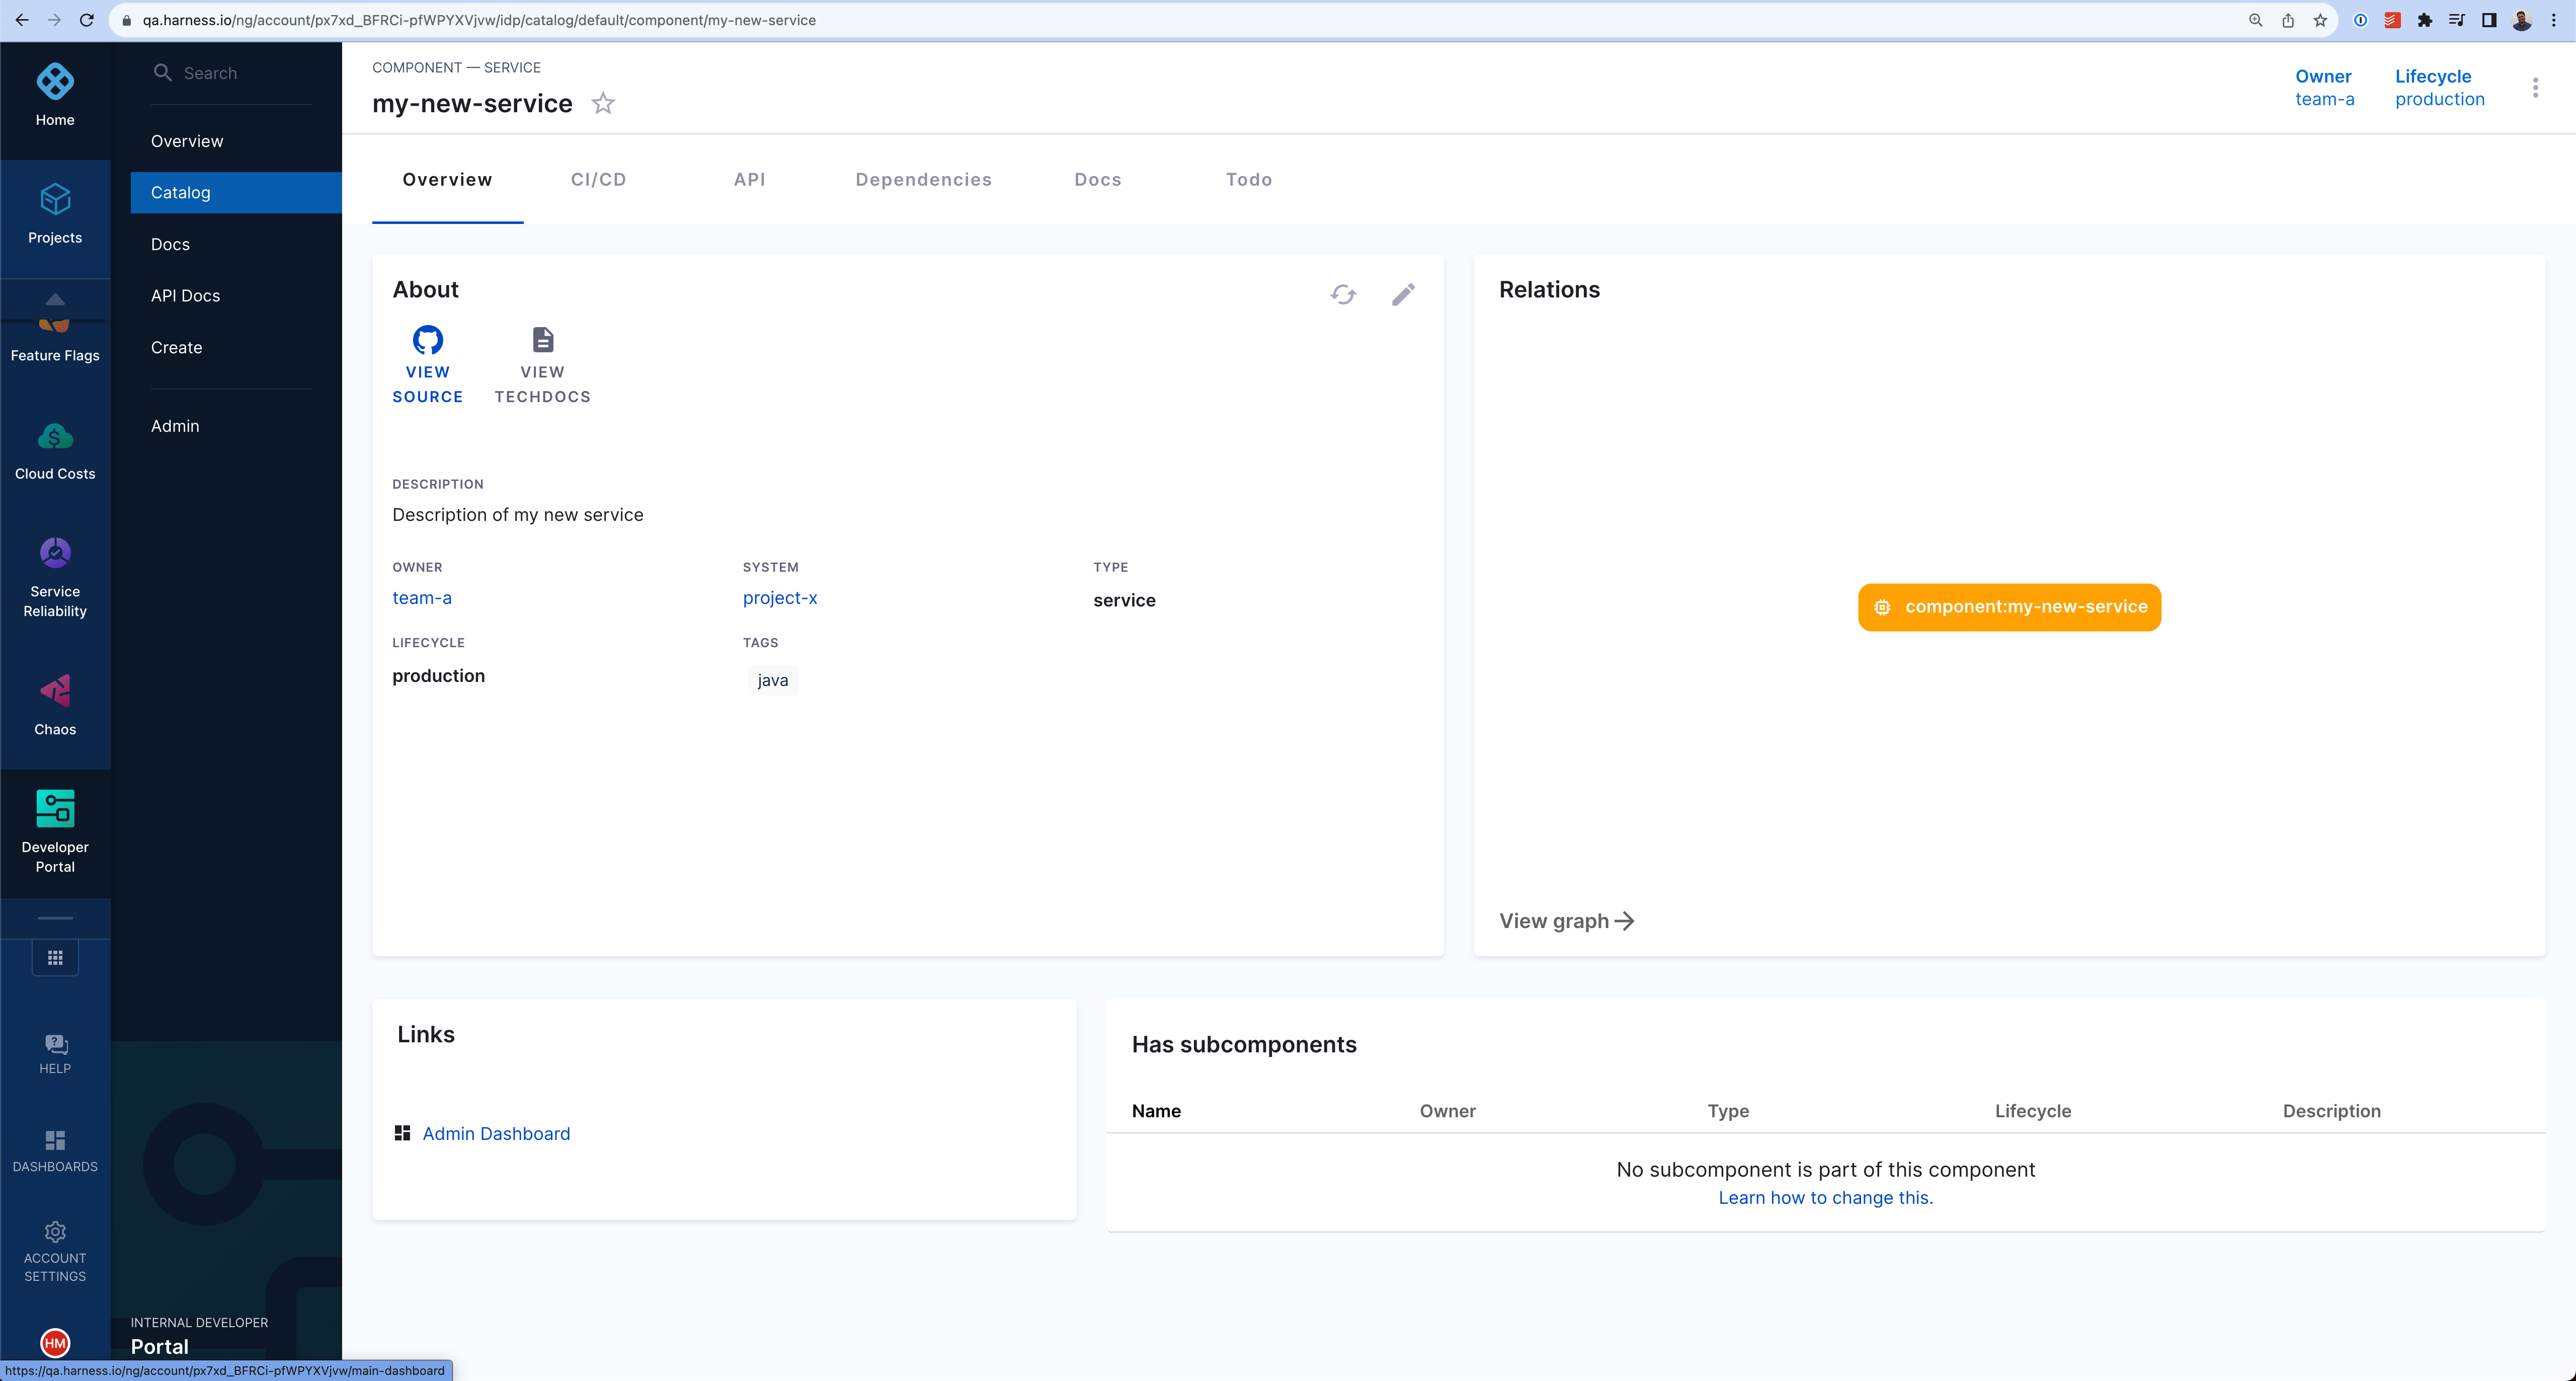
The new component is available in your catalog.
Further reading
For those looking to expand their knowledge and explore more advanced methods of registering software components on Harness IDP, consider the following:
GitHub auto-discovery plugin
If you are aiming to register multiple components in the software catalog concurrently, the GitHub auto-discovery plugin is a valuable tool. This plugin automates the discovery and registration of components, with all the idp yamls located in single repo.
Use the catalog API
Another effective approach is leveraging the catalog API. By running a custom script as shown in the example below, you can automate the registration of components, providing a more programmatic method for bulk registrations.
#!/bin/bash

set -e

function usage {
    echo "usage: $0 [-a accountIdentifier] [-x xApiKey] [-u bearerAuthorization] [-l catalogLocations]"
    echo "  -a      Harness Account Identifier"
    echo "  -x      Harness X-API-KEY for the given account"
    echo "  -u      Harness Bearer Authorization from the logged in session"
    echo "  -l      Catalog locations to be registered in Harness IDP. Comma separated list of locations"
    exit 1
}

while getopts a:x:u:l:h flag
do
    case "${flag}" in
        a) ACCOUNT_ID=${OPTARG};;
        x) X_API_KEY=${OPTARG};;
        u) BEARER_AUTHORIZATION=${OPTARG};;
        l) CATALOG_LOCATIONS=${OPTARG};;
        h | ?) usage
    esac
done

echo -e "\nStarting catalog location registration for given location in Harness IDP...";

CATALOG_LOCATION_REGISTER_DATA='{"type":"url","target":"CATALOG_LOCATION_TARGET"}'

for LOCATION in ${CATALOG_LOCATIONS//,/ }
do
    echo -e "\n--------"
    echo "Registering $LOCATION catalog location in Harness IDP account $ACCOUNT_ID"

    POST_DATA=${CATALOG_LOCATION_REGISTER_DATA/CATALOG_LOCATION_TARGET/$LOCATION}

    RESULT_HTTP_CODE=$(curl --write-out %{http_code} -s --output /dev/null -H "Content-Type: application/json" -H "Harness-Account: $<ACCOUNT_ID>" -H "x-api-key: ${X_API_KEY}" -H "Authorization: Bearer ${BEARER_AUTHORIZATION}" -X POST --data "${POST_DATA}" "https://idp.harness.io/$<ACCOUNT_ID>/idp/api/catalog/locations")

    if [[ "$RESULT_HTTP_CODE" -ne 201 ]] ; then
        echo "Failed registering $LOCATION catalog location in Harness IDP account $ACCOUNT_ID"
    else
        echo "Successfully registered $LOCATION catalog location in Harness IDP account $ACCOUNT_ID"
    fi

    echo "--------"
done

echo -e "\nCompleted catalog location registration for given location in Harness IDP...";