Manage delegate notifications
Currently, this feature is behind the feature flag PL_CENTRAL_NOTIFICATIONS. Contact Harness Support to enable the feature.
With notifications management, you can configure notifications for the delegate events below:
- Delegate Disconnected
- Delegate Expired
- Delegate Expires in 1, 2, 3, or 4 weeks
Manage notification rules
You can use notifications management to configure and edit notifications for delegate events from the account, project, or org scope in Harness.
Add a delegate event notification rule
You can add delegate event notification rules at the account, project, or org scope.
To add a delegate event notification rule, do the following:
-
In Harness, go to Account Settings, Organization Settings, or Project Settings, depending on the scope at which you want to add a delegate event notification rule.
-
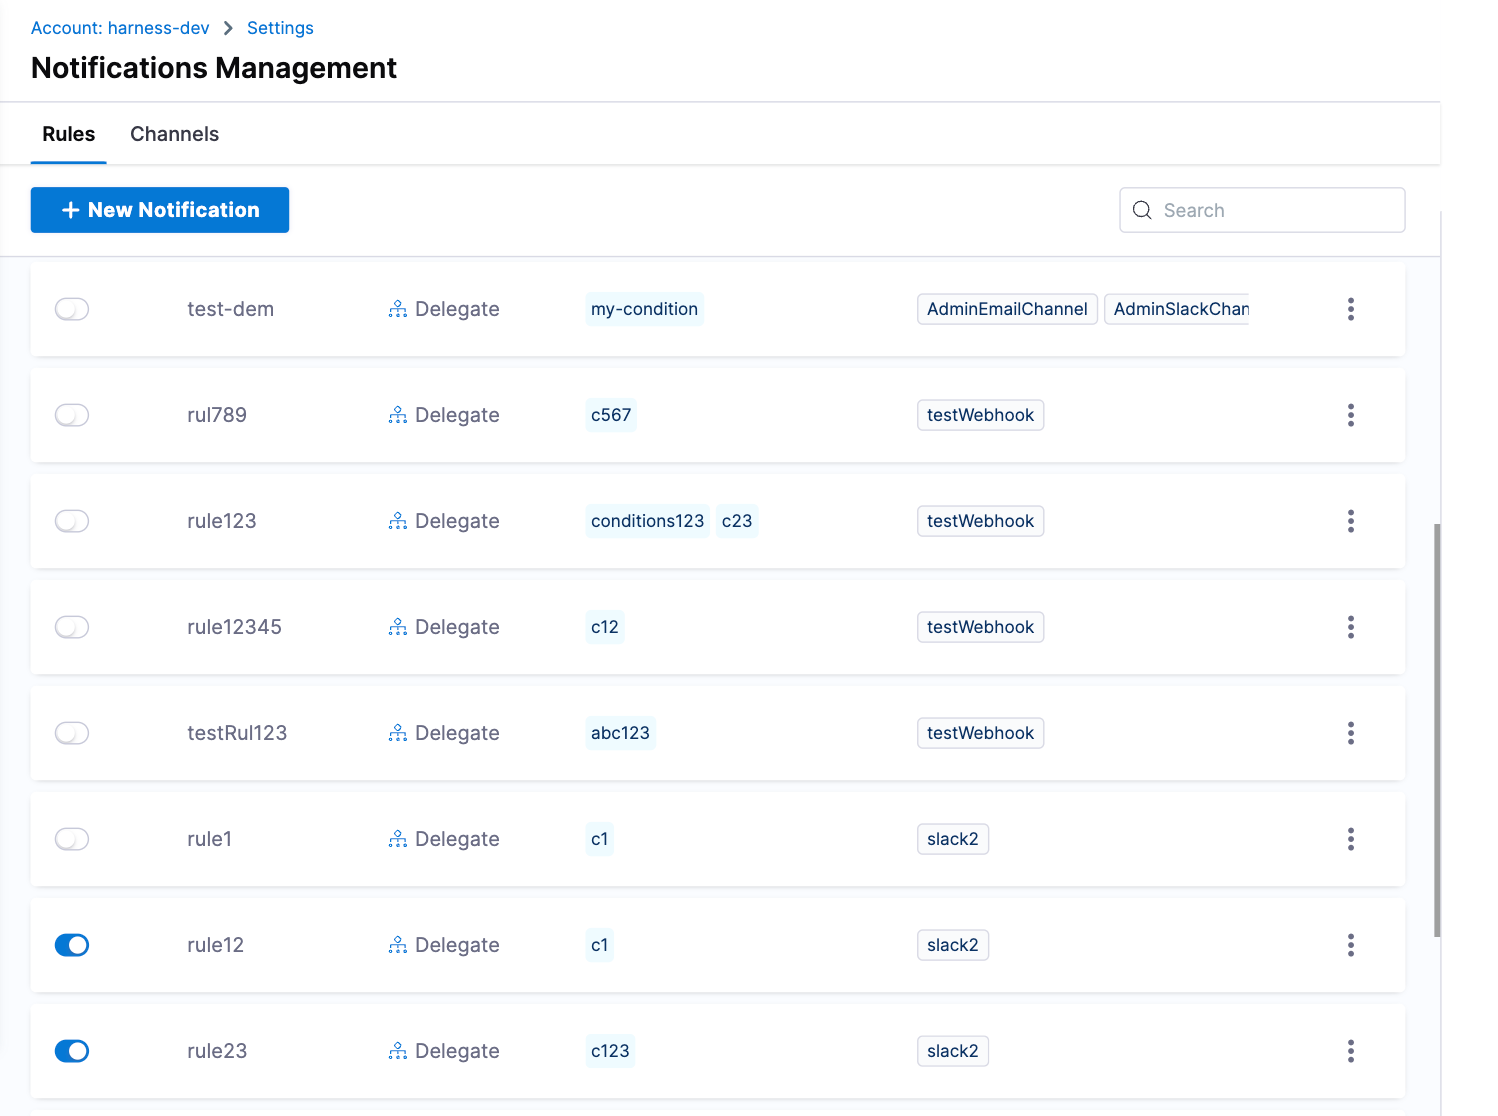
Under General, select Notifications Management. The Notification Management page opens to the Rules tab by default.
-
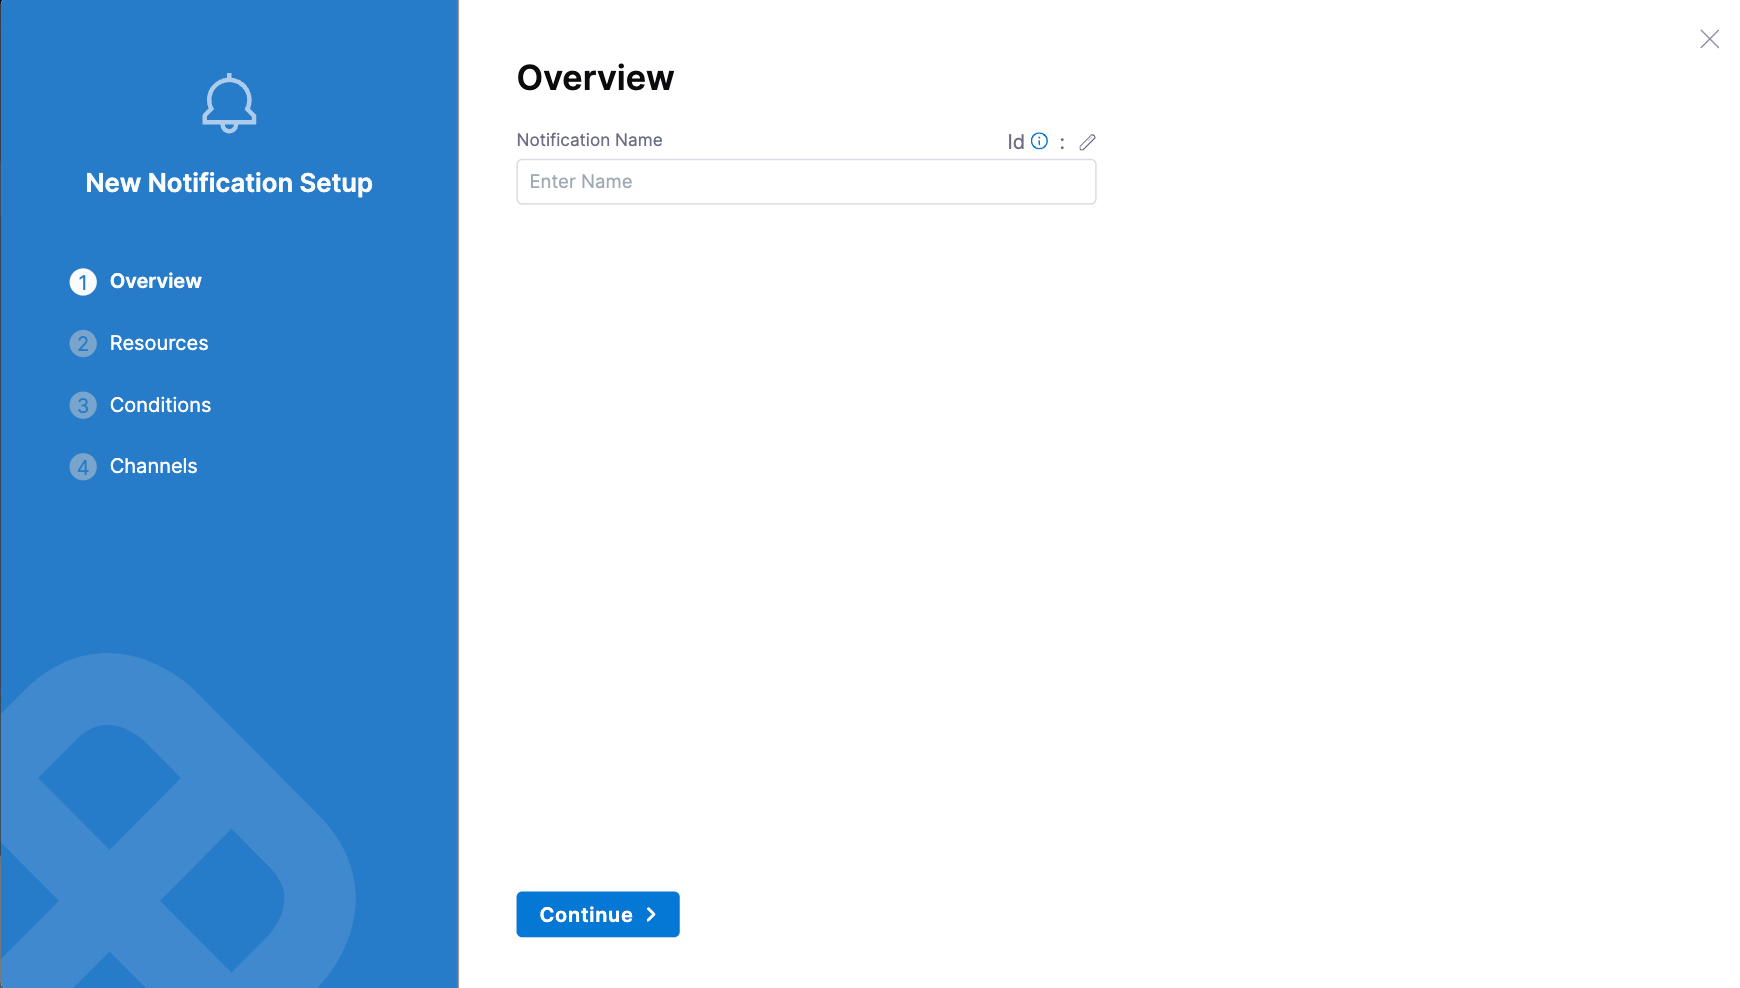
Select New Notification. The New Notification Setup wizard opens.
-
On the Overview screen, enter a Notification Name, then select Continue. The Resources screen opens.
-
Under Select Resource Type, Delegate is selected for you by default. Harness plans to add additional resource types in future releases.
-
Under Select Delegates, select the delegate for which you want to set up notifications, then select Continue. The Set Conditions screen opens. Here, you define the events for which you want to be notified.
-
Select Add Condition. The Create Condition dialog opens.
-
In Condition Name, enter a name for your notification condition, for example,
Delegate expires soon. -
Select Add Events, and then select the events you want to be notified about, such as About to expire in 2 weeks. You can select multiple events.
-
Select Apply, then select Continue. The Set Channels screen opens.
-
Select your Notification Channels.
-
To enable the rule now, toggle the Enable on Save option. If you don't want to enable the rule now, you can enable the delegate event notification rule later on the Notifications Management page
-
Select Submit.
Your notification is added to the Notifications Management page.
-
Enable a delegate event notification rule
After you create a delegate event notification rule, if you didn't enable the rule when you first created it, you must enable the rule to receive notifications.
You can enable notification rules at the account, project, or org scope.
To enable a delegate event notification rule, do the following.
- In Harness, go to Account Settings, Organization Settings, or Project Settings, depending on the scope at which you want to enable notification rules.
- Under General, select Notifications Management. The Notification Management page opens to the Rules tab by default.
- Locate the rule you want to enable and enable the Status toggle. Harness confirms that you enabled the rule.
Disable a delegate event notification rule
You might need to temporarily disable notification rules you've set.
You can disable notification rules at the account, project, or org scope.
To disable a delegate event notification rule, do the following.
- In Harness, go to Account Settings, Organization Settings, or Project Settings, depending on the scope at which you want to disable a delegate event notification rule.
- Under General, select Notifications Management. The Notification Management page opens to the Rules tab by default.
- Locate the rule you want to disable and disable the Status toggle. Harness confirms that you disabled the rule.
Edit a delegate event notification
You can use notifications management to edit notifications for delegate events from the account, project, or org scope.
To edit delegate event notifications, do the following:
- In Harness, go to Account Settings, Organization Settings, or Project Settings, depending on the scope at which you want to edit notifications.
- Under General, select Notifications Management. The Notification Management page opens to the Rules tab by default.
- Select More Options (⋮) for the notification you want to update, and then select Edit. The Edit Notification Setup wizard opens.
- Edit your notification information on the necessary screen, selecting Continue to step through the wizard until you reach the Set Channels screen, then select Submit to save your changes.
Delete a delegate event notification
You delete notifications for delegate events from the account, project, or org scope.
To delete a delegate event notification, do the following:
- In Harness, go to Account Settings, Organization Settings, or Project Settings, depending on the scope at which you want to delete an event notification.
- Under General, select Notifications Management. The Notification Management page opens to the Rules tab by default.
- Select More Options (⋮) corresponding to the notification you want to delete, and then select Delete. A confirmation dialog opens.
- Select Delete.
Manage event notification channels
With notifications management, you can enable or disable notification channels at the account, project, and org scopes. For more information on notification channels, go to Get started with notifications.
Add a new channel
You can add a new notification channel from the account, project, or org scope.
To add a new channel, do the following:
-
In Harness, go to Account Settings, Organization Settings, or Project Settings, depending on the scope at which you want to add a channel.
-
Under General, select Notifications Management. The Notification Management page opens to the Rules tab by default.
-
Select Channels, then select New Channel. The Create Channel dialog opens.
-
Enter your Channel Name.
-
Select the Channel Type. You can enable or disable the following notification channels:
- Slack
- Microsoft Teams
- PagerDuty
- Webhooks
-
(Optional) Select Add to add additional channels.
-
Select Apply to save your changes.
Edit a channel
You can edit a notification channel from the account, project, or org scope.
To edit a channel, do the following:
- In Harness, go to Account Settings, Organization Settings, or Project Settings, depending on the scope at which you want to edit a notification channel.
- Under General, select Notifications Management. The Notification Management page opens to the Rules tab by default.
- Select Channels.
- Select More Options (⋮) corresponding to the channel you want to update, and then select Edit. The Edit Channel dialog opens.
- Update your channel settings, then select Apply to save your changes.