Tutorial: SAST code scans using Semgrep
This tutorial shows you how to scan your codebases using Semgrep, a popular tool for detecting vulnerabilities in application code. Semgrep can scan a wide variety of languages and includes a free version for individuals who want to scan files locally.
In this tutorial, you'll set up a simple pipeline with a Semgrep step running in orchestration mode.

-
This tutorial uses the free version of Semgrep to run simple SAST scans. More advanced workflows are possible but are outside the scope of this tutorial.
-
Semgrep scans use an agent that uploads data to the Semgrep cloud by default. Semgrep uses this data to improve the user experience. Therefore this tutorial is not suitable for air-gapped environments.
-
This tutorial has the following prerequisites:
- A connector to your Git account (for example,
http://github.com/my-account) - Your connector should use a Harness text secret for your Git access token.
- A connector to your Git account (for example,
Set up your pipeline
Do the following:
-
Select Security Testing Orchestration (left menu, top) > Pipelines > Create a Pipeline. Enter a name and click Start.
-
In the new pipeline, select Add stage > Security.
-
Under Configure Codebase, select the connector to your Git account.
-
In Repository Name, open the value-type pulldown (right) and select Runtime Input.

-
-
Go to Infrastructure and select Cloud, Linux, and AMD64 for the infrastructure, OS, and architecture.
Add the Semgrep step
-
In Execution, click Add step and select Semgrep.
-
In the Semgrep step, verify that the Scan mode is Orchestration.
-
Set Fail on Severity to Medium.
-
Apply your changes and save the pipeline.
Run the pipeline and check your results
-
Run the pipeline: click Run (top right). The Run Pipeline dialog box appears.
-
Enter the repository and branch to scan.
When you scan a codebase for the first time, the standard practice is to scan the root branch. This is usually the
mainormasterbranch. -
Run the pipeline and then wait for the execution to finish.
If the scan detected any critical vulnerabilities, the pipeline fails with the message
Exited with message: fail_on_severity is set to critical and that threshold was reached.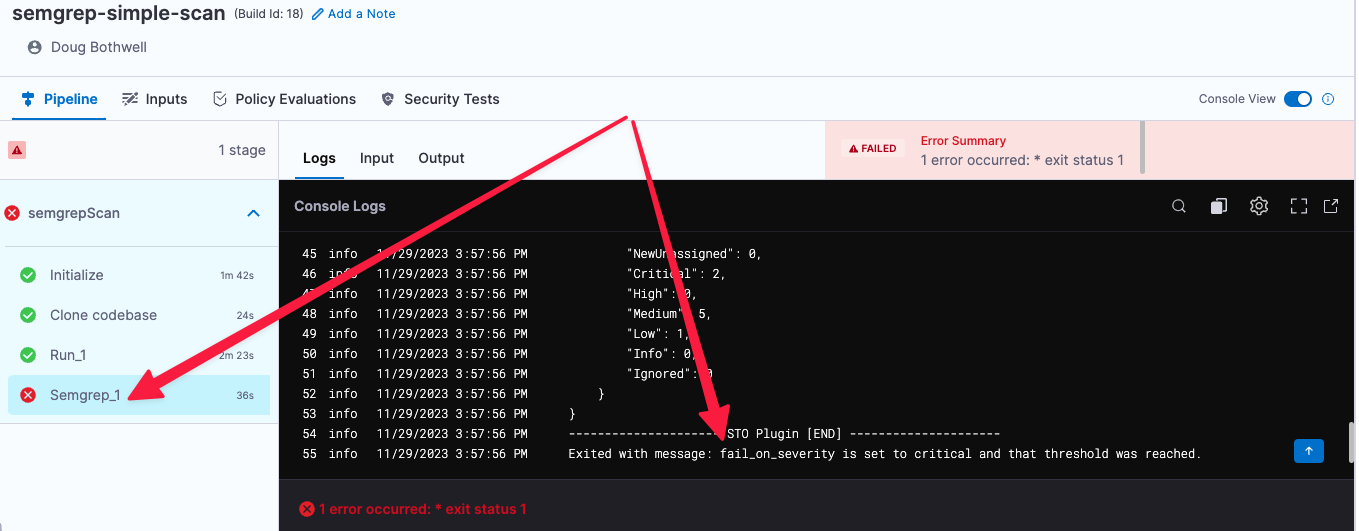
-
Select Security Tests and examine any issues detected by your scan.

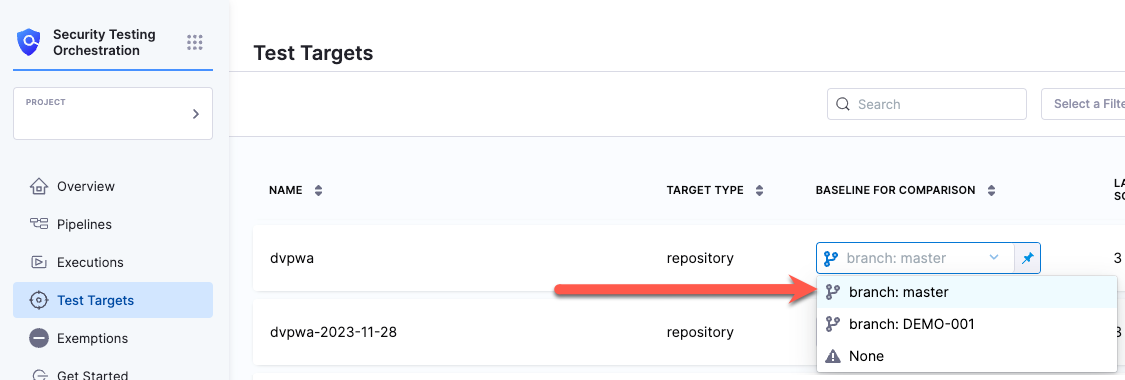
Specify the baseline
It is good practice to specify a baseline for every target. Defining a baseline makes it easy for developers to drill down into "shift-left" issues in downstream variants and security personnel to drill down into "shift-right" issues in the baseline.
-
Select Test Targets (left menu).
-
Select the baseline you want for your target.
YAML pipeline example
Here's an example of the pipeline you created in this tutorial. If you copy this example, update YOUR_GIT_CONNECTOR_ID with your codebase connector.
pipeline:
  name: harness_semgrep_tutorial
  identifier: harness_semgrep_tutorial
  projectIdentifier: default
  orgIdentifier: default
  tags: {}
  stages:
    - stage:
        name: scan_codebase
        identifier: scan_codebase
        description: ""
        type: SecurityTests
        spec:
          cloneCodebase: true
          platform:
            os: Linux
            arch: Amd64
          runtime:
            type: Cloud
            spec: {}
          execution:
            steps:
              - step:
                  type: Semgrep
                  name: Semgrep_1
                  identifier: Semgrep_1
                  spec:
                    mode: orchestration
                    config: default
                    target:
                      type: repository
                      detection: auto
                    advanced:
                      log:
                        level: info
                      fail_on_severity: medium
  properties:
    ci:
      codebase:
        connectorRef: YOUR_GIT_CONNECTOR_ID
        repoName: <+input>
        build: <+input>