Snyk Container scanning
The Snyk step in Harness STO allows you to find and fix vulnerabilities in container images based on container registry scans. This document helps you to configure Snyk step in your pipeline to perform Snyk Container scanning either through orchestration or ingestion scan modes in STO.
- Orchestration mode: In this mode, the Snyk step runs the scan, then normalizes and deduplicates the results.
- Ingestion mode: In this mode, the Snyk step reads scan results from a data file, normalizes the data, and deduplicates it.
Refer to the Snyk step configuration document to learn more about the fields in the Snyk step and how to configure them.
Snyk Container scan - Orchestration mode
To perform Snyk Container scanning with orchestration scan mode, follow the below steps:
-
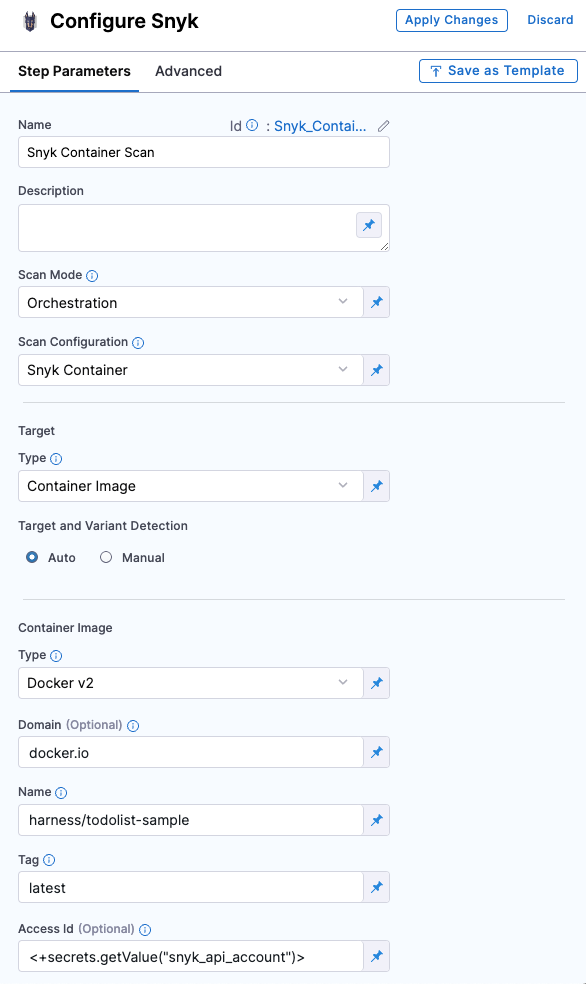
Search and add the Snyk step to your pipeline. You can use this step in Build stage or Security stage.
-
In the step configuration, set the following fields
- Set the Scan Mode to Orchestration
- Under Target, set the Type to Container
- Set the Scan Configuration to Snyk Container
- For Target and Variant Detection it's preferred to use Auto option or you can define them using the Manual option.
- Under Container Image section, set the Type, Domain, Name, and Tag of your image.
- In Access Id and Access Token, you can pass the username and password of your container registry as Harness Secrets, which helps you access your private images. (Optional)
- Under Authentication, pass your Snyk API as Harness secret, for example:
<+secrets.getValue("snyk_api_token")>

Refer to Snyk step configuration document to learn more about all the fields and their configurations.
Snyk Container scan - Ingestion mode
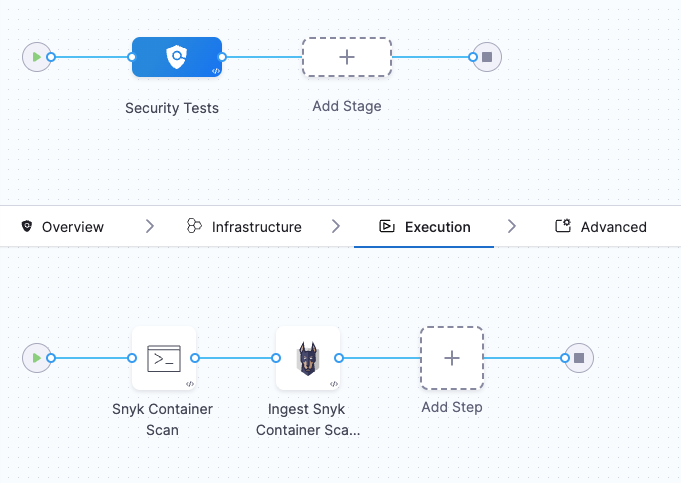
In the Ingestion scan mode, the Snyk step reads data from a file, normalizes it, and deduplicates it. To perform a Snyk Container scan using the Ingestion scan mode, we will use two steps:
- Run Step: Scan the container with the Snyk CLI and save the results to a SARIF file.
- Snyk Step: Ingest the scan results from the SARIF file.
 =
=
Requirements
Go to the Overview tab of the stage. Under Shared Paths, enter the following path: /shared/scan_results, this will be the location where the Run step will save the scan results.
Configure Run step
-
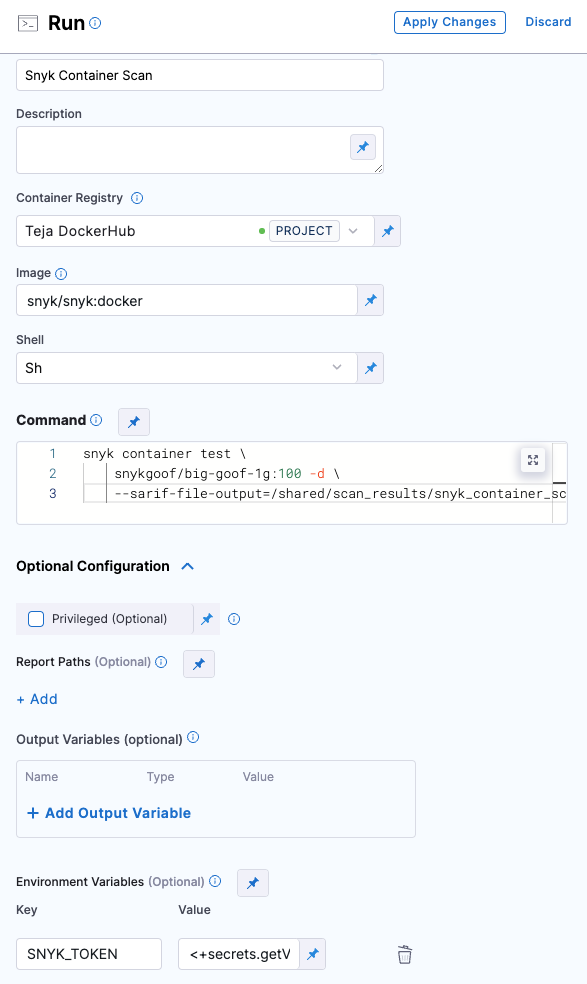
Add the Run step to the pipeline and open the step configuration.
-
In the Container Registry section, set your DockerHub connector. Snyk images will be pulled from their DockerHub account.
-
For Image, use
snyk/snyk:docker -
Set the Shell field to
sh -
In the Command field, enter the following command.
snyk container test \ snykgoof/big-goof-1g:100 -d \ --sarif-file-output=/shared/scan_results/snyk_container_scan.sarif || true
Snyk maintains a set of snykgoof repositories that you can use for testing your container-image scanning workflows.
- In Optional Configuration, under Environment Variables, add a variable to access your Snyk API key:
SNYK_TOKEN =<secrets.getValue("snyk_api_token")> - In Advanced tab under Failure Strategies, set the Failure Strategy to Mark as Success. This step is required to ensure that the pipeline proceeds if Snyk finds a vulnerability. Otherwise, the build exits with an error code before STO can ingest the data.
 =
=
Configure Snyk step
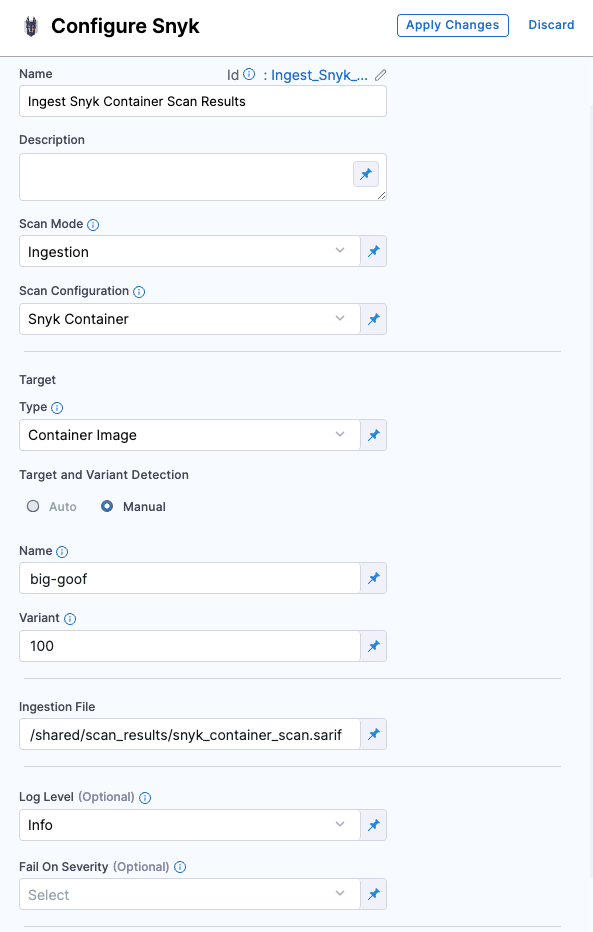
- Add the Snyk step and open the step configuration.
- Set the Scan Mode to Ingestion.
- Set the Target Type to Container.
- For Target and Variant Detection, define them with the Manual option selected.
- In the Ingestion File field, enter
/shared/scan_results/snyk_container_scan.sarif - Apply your changes, save the configuration, and run the pipeline.

Refer to Snyk step configuration document to learn more about all the fields and their configurations.